

A Basement Reveal That Will Motivate You to Organize Your Own
We’ve been working on a laundry/seasonal storage basement project for quite some time. It started at the end of January and 5 weeks later we are wrapping up.
I want to point this out because there is no magic wand when it comes to organizing (ugh, I know). Whether you hire a team to come to your home and whip it into shape, or you do it yourself - it takes time and hard work. This project took Ty and I about 5 weeks to complete during a combination of weekends and nap-times. In that time we were able to:
Tile the unfinished basement concrete floors
Design and plan a 300 sq ft laundry and basement area
Measure all areas and larger items for space planning
Assemble 3 shelving units and 1 wardrobe
Take inventory of everything we own, sort, reorganize and label
If you are in the market for a larger project like this one, I’ll be posting tips for the best way to approach it. There is definitely a strategy to it and I want to help you be successful.
Now for the fun stuff. Here is where we started:

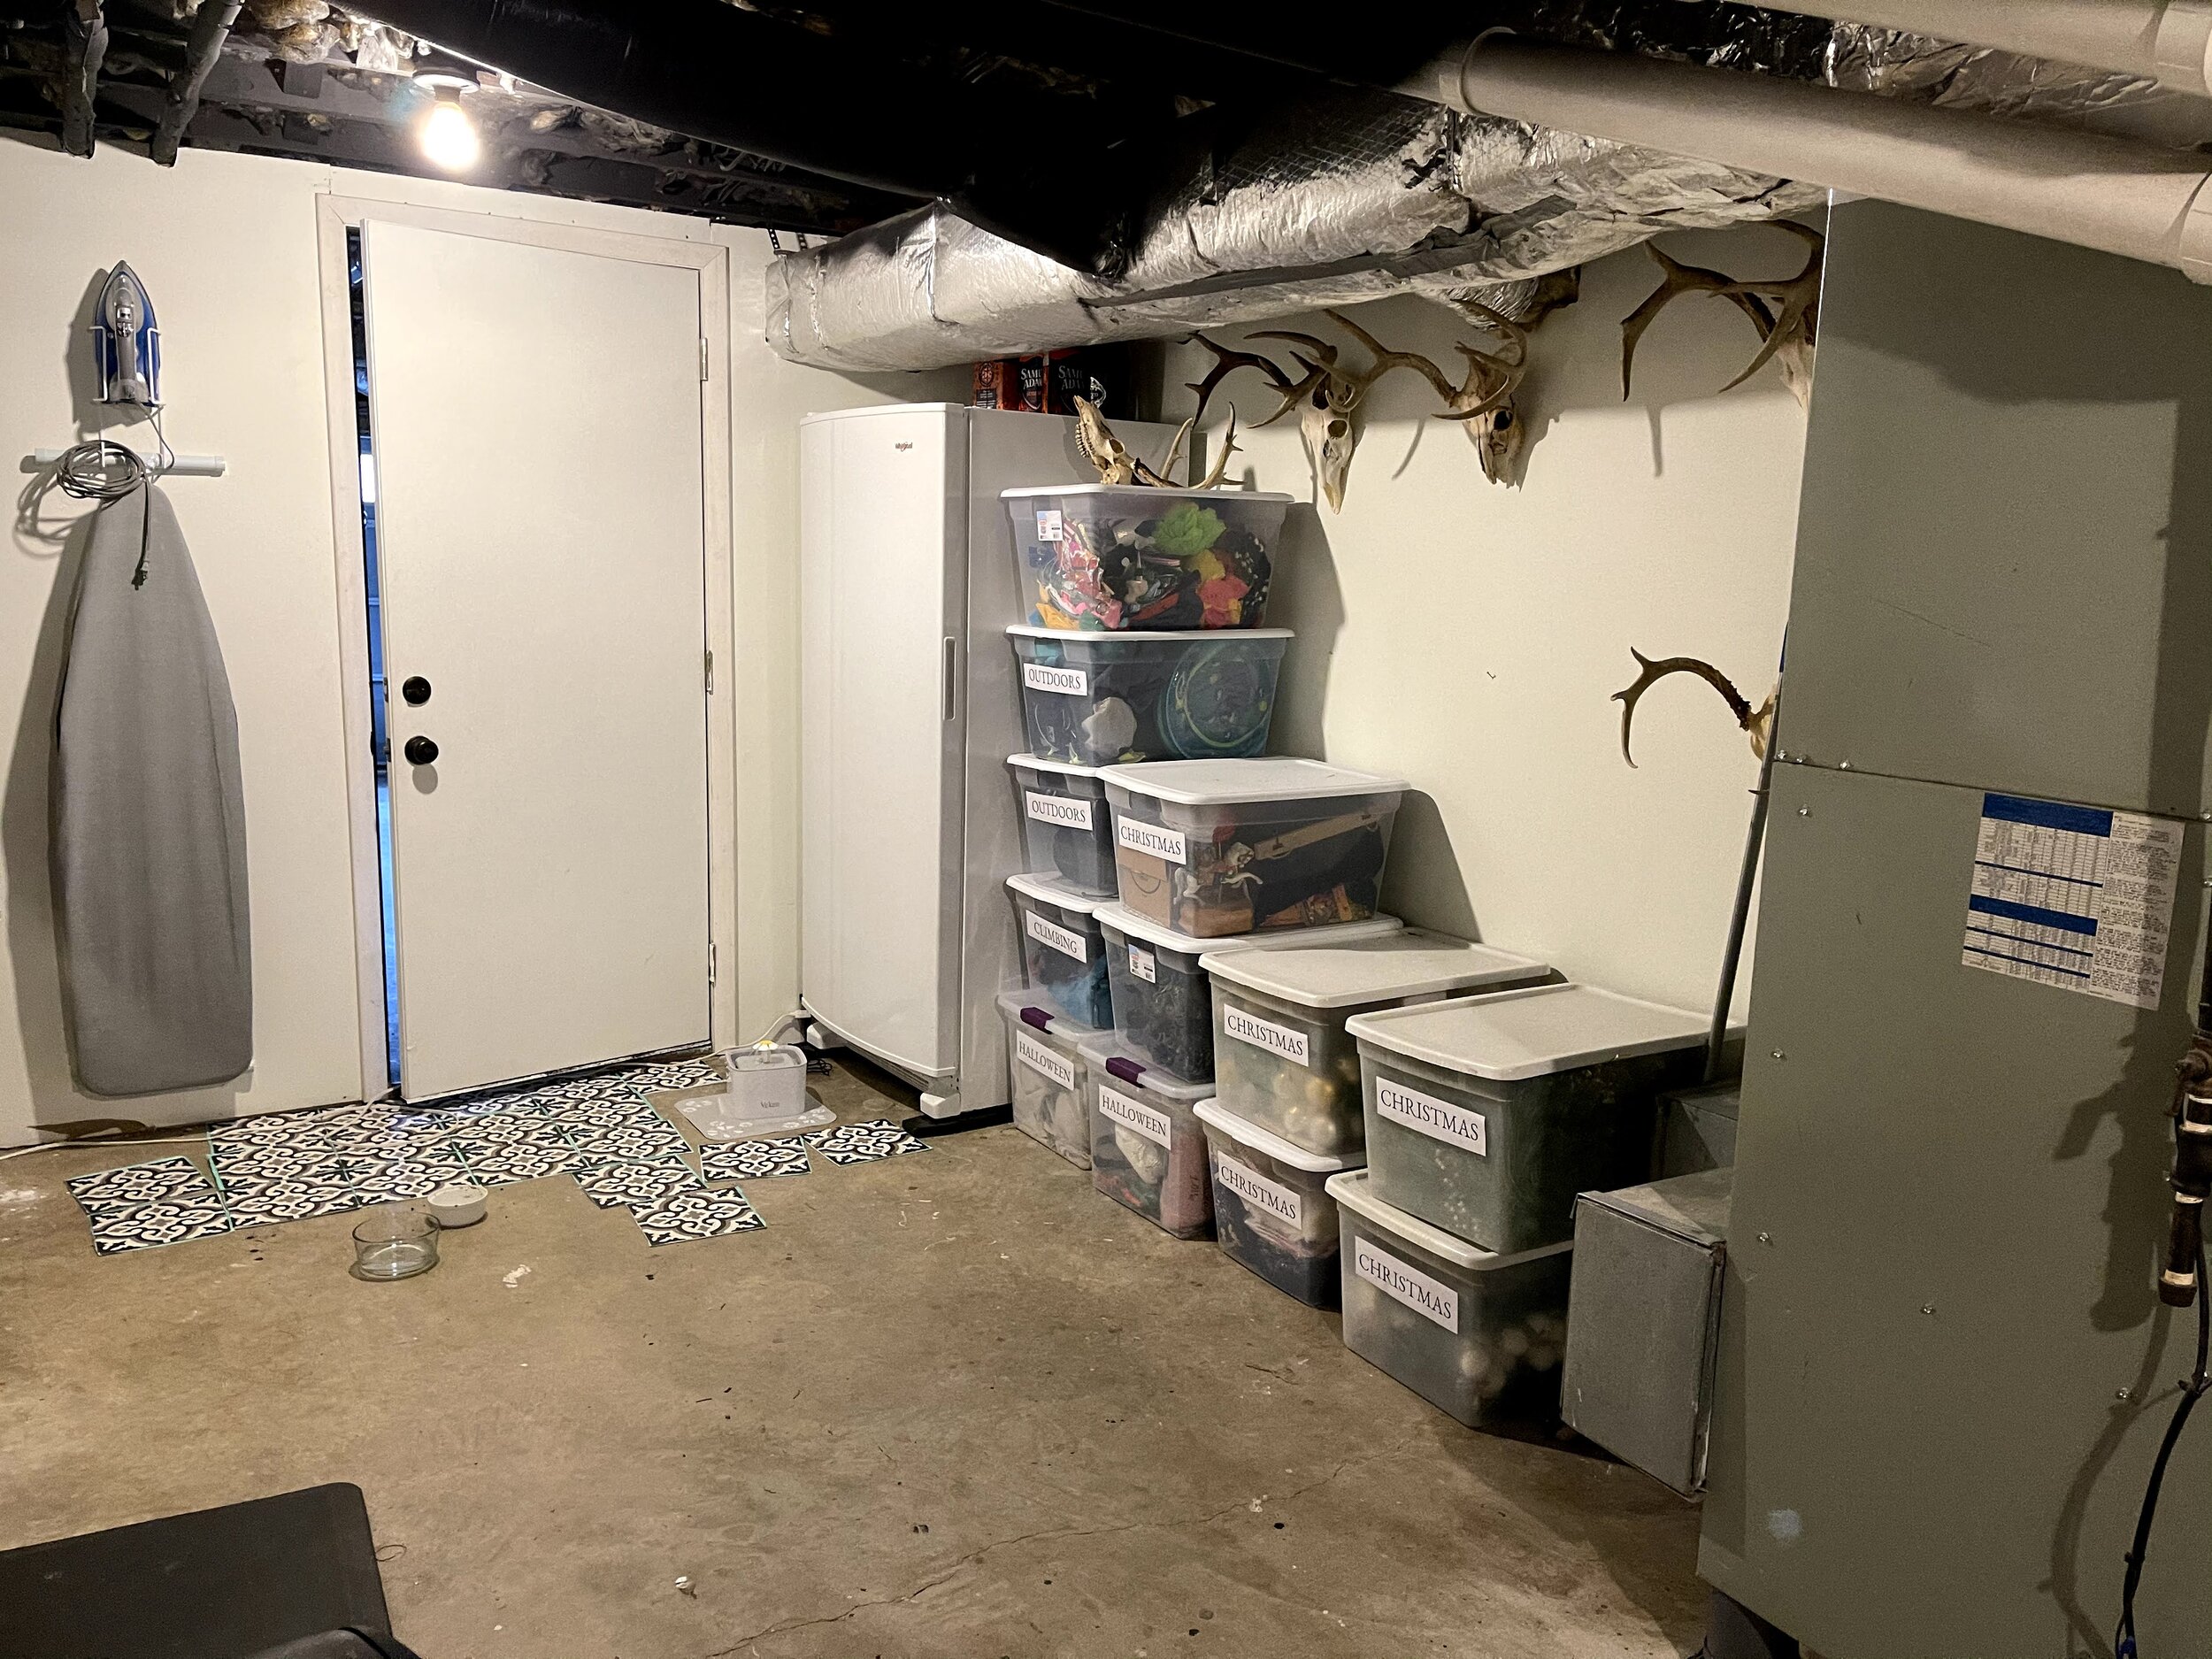

You can see that this currently serves as a laundry, seasonal storage, and tool storage.
I mentioned this on instagram, but I am also writing up a big ole post on how to start a big project like this, as well as how to create a vision board for your space so you don’t get stuck (mid-project regret syndrome is real!). So stay tuned for those too!
Here is the vision board for the space.
I started by sitting in the middle of the room and writing out all the current functions of the space. PLUS all the ways I wanted it to serve me that it currently was not.
Then I drew up a plan for the space using canva and pictures from online.
I pinned a few inspo images to this board too. That way, I had some ideas for terms of storage options and overall feel. This gave me a starting platform for each of the boards.
I knew that I wanted it to stay black and white with clear storage and new flooring was a MUST. Before it was super dusty and honestly full of cat puke that we can’t clean because everything just dries into the floors (gross, I know!).


I divided the space into three zones and created 3 separate boards for the space. Keep scrolling because you are about to see the before, vision and after’s of the space.
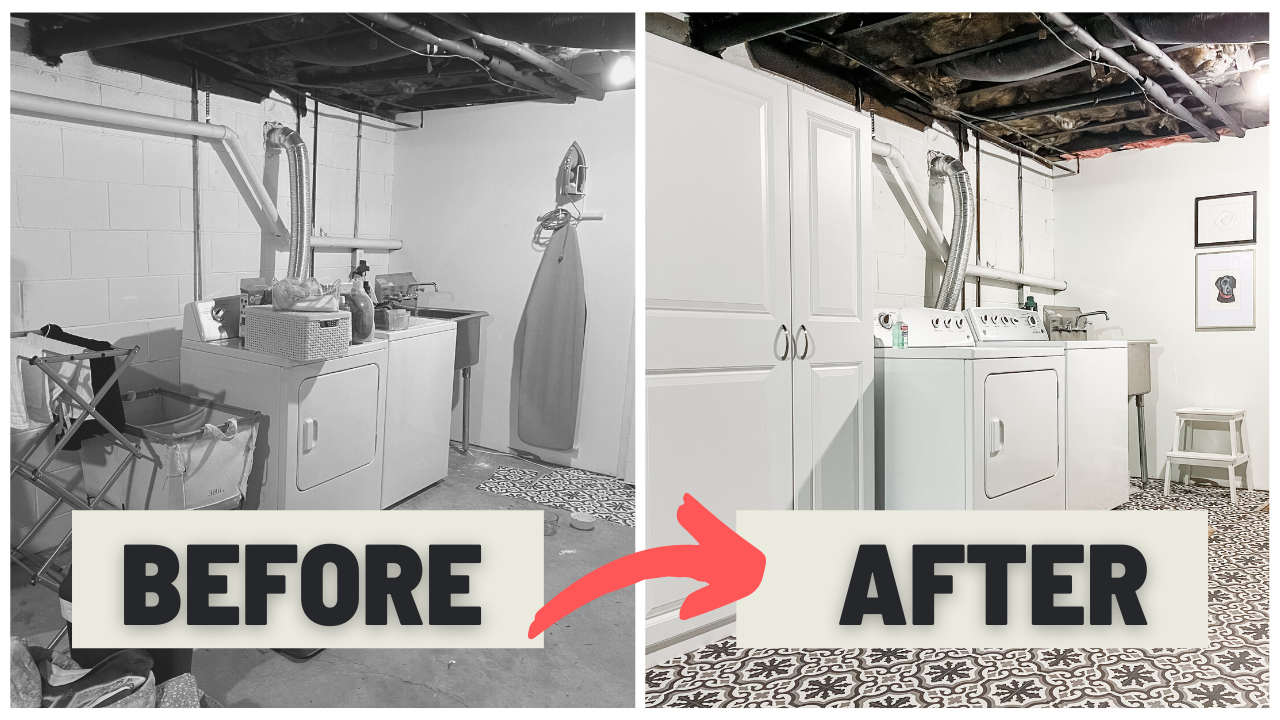
ZONE 1: LAUNDRY


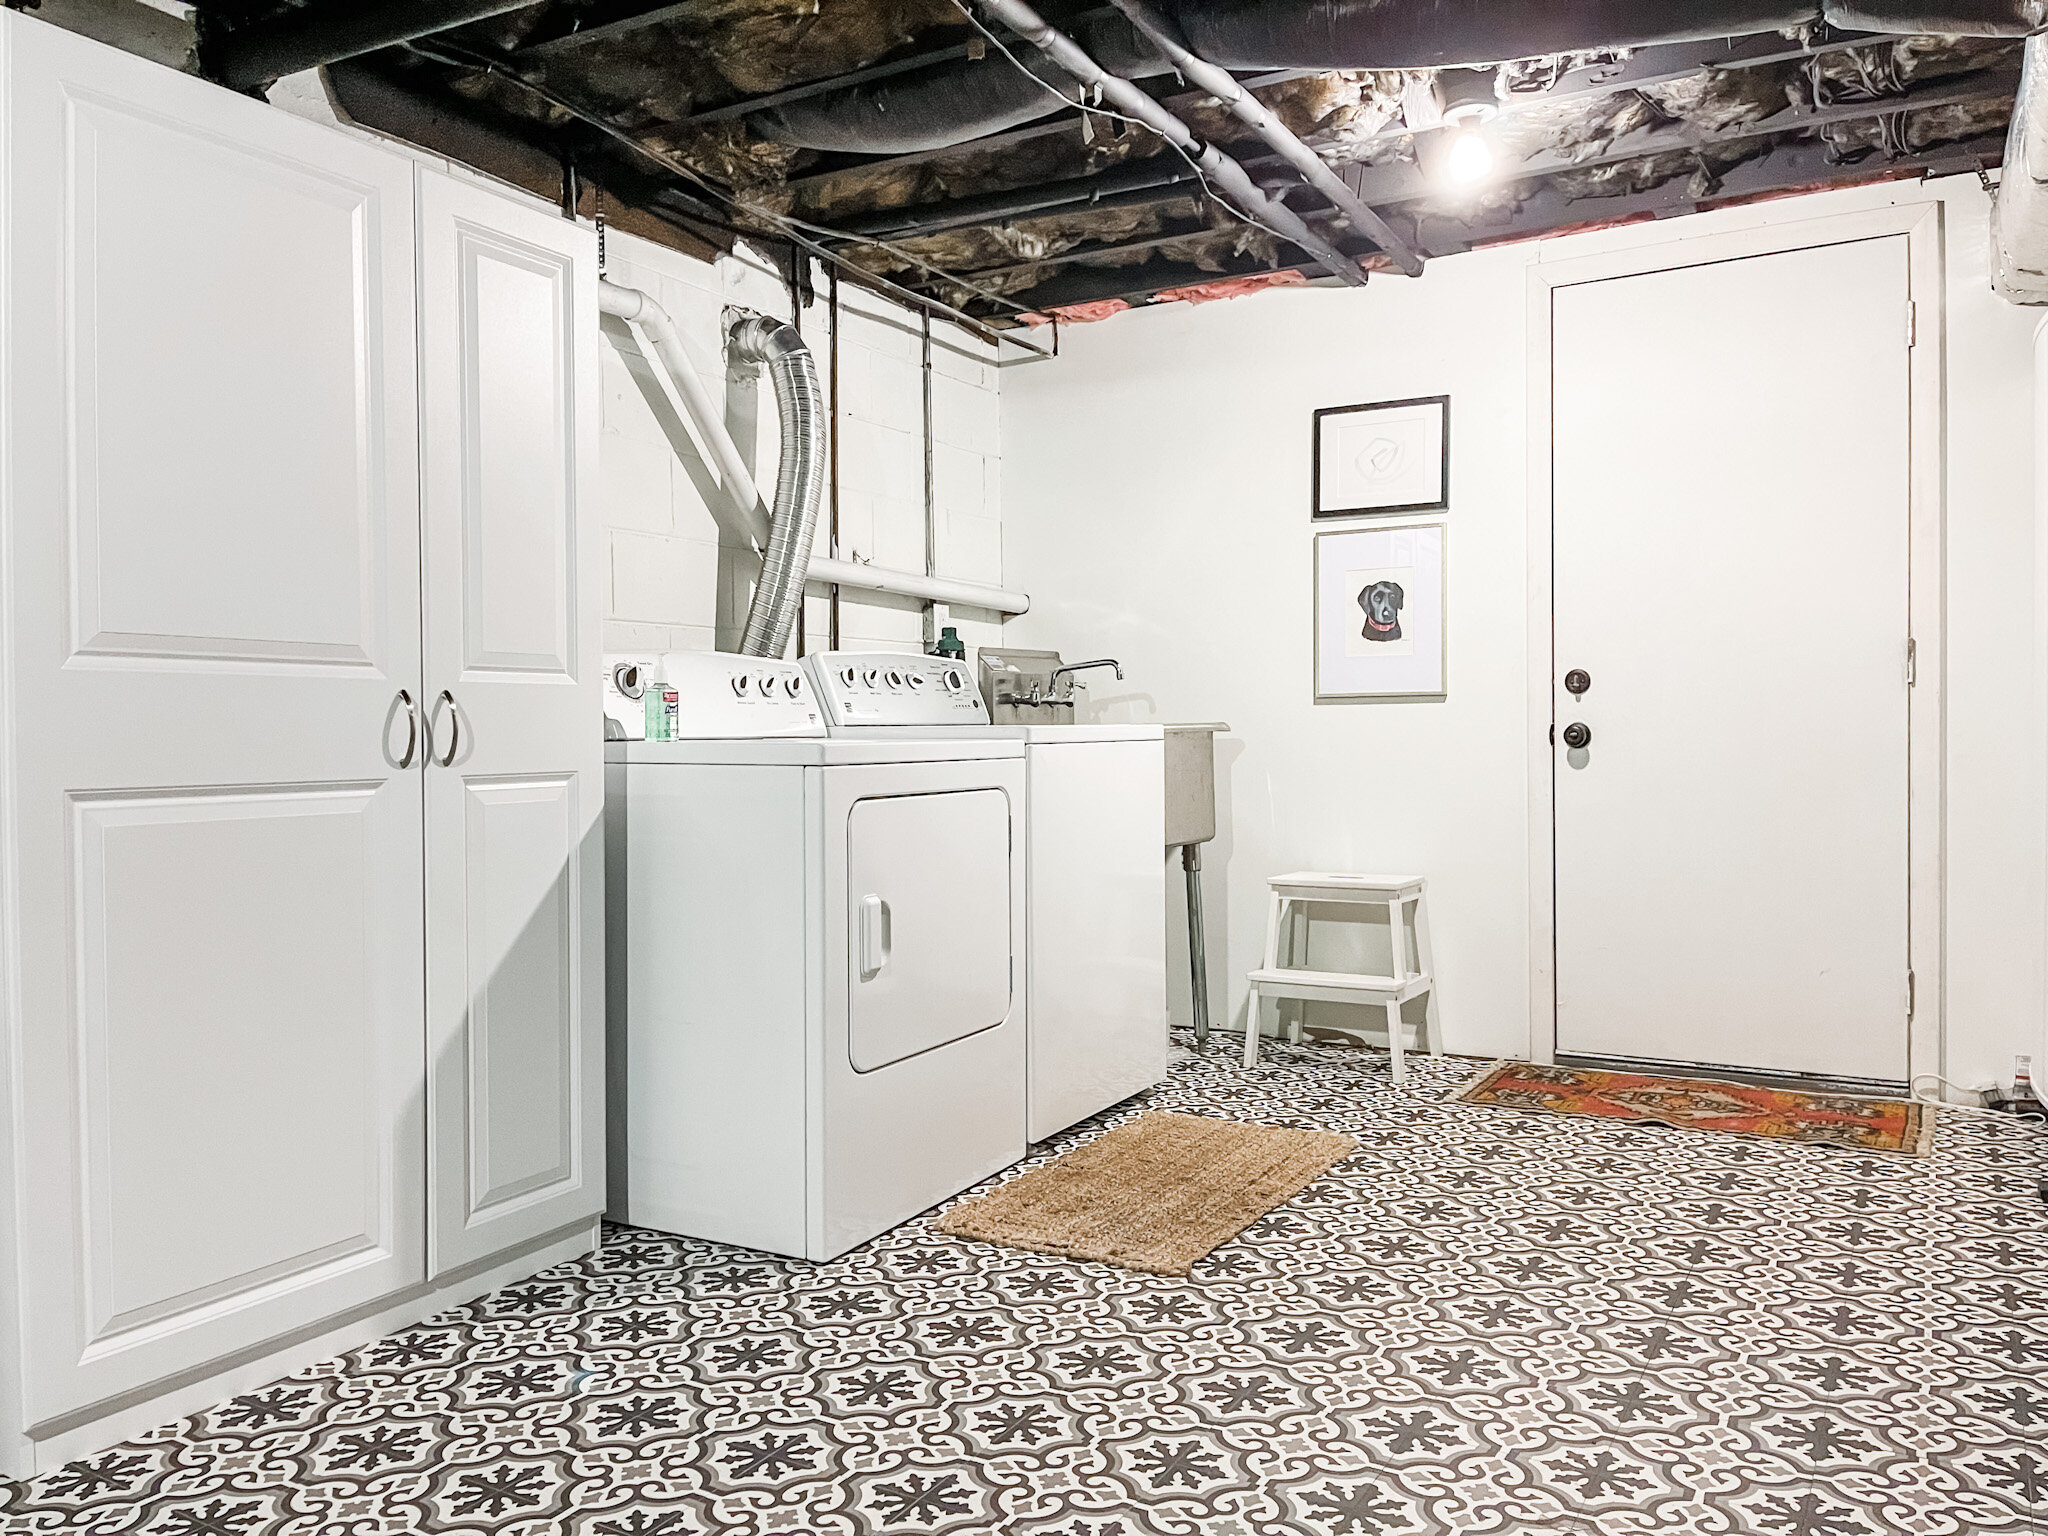
How close did we stay with the original design? I think we preserved the overall functionality (which was the primary goal!) but we did have to use a different organizing solution. We tried to order the IKEA Boaxel system but it was out of stock for delivery. We even looked at Elfa from the Container Store but it was out of budget.
“Form FOLLOWS function. That means nail the function first and the pretty stuff will follow.”
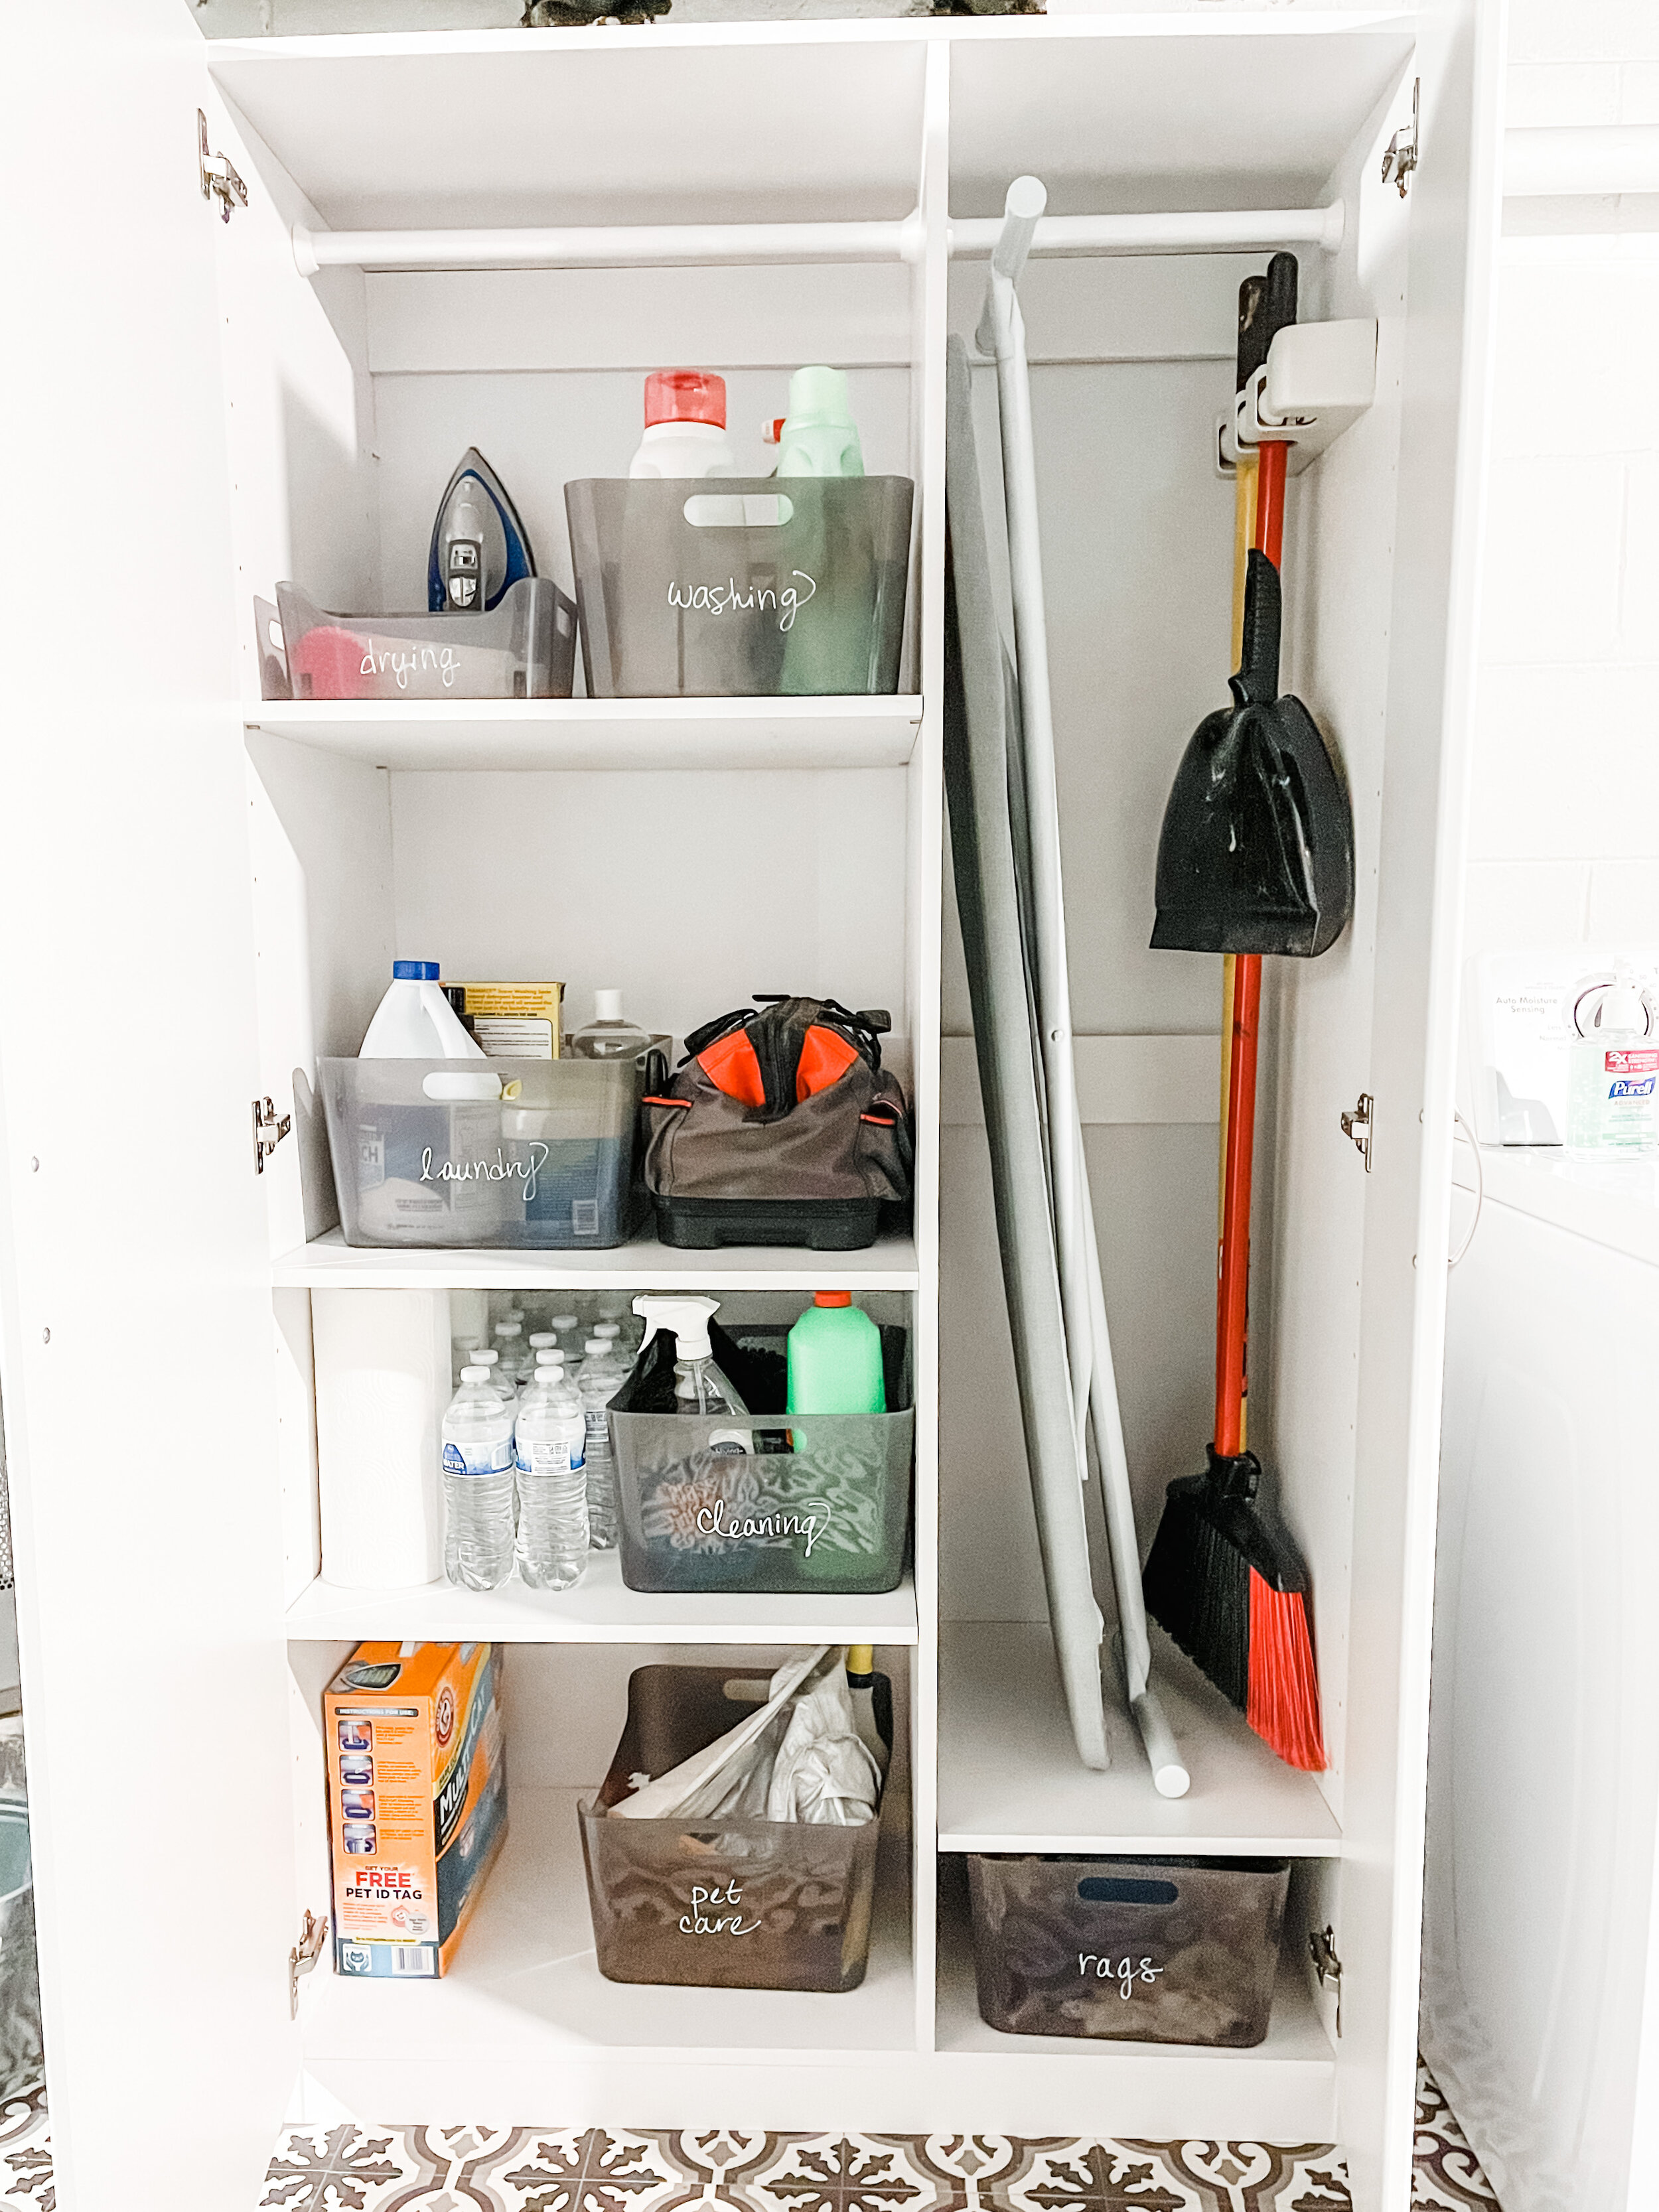
This wardrobe actually ended up being an even better option though because it provides closed storage. The kitty cats are into everything. This will allow me to have rags, and their food stored and nearby WITHOUT the cat hair which I’m excited about. Here is a peak at how I organized the inside:
ZONE 2: TOOL STORAGE


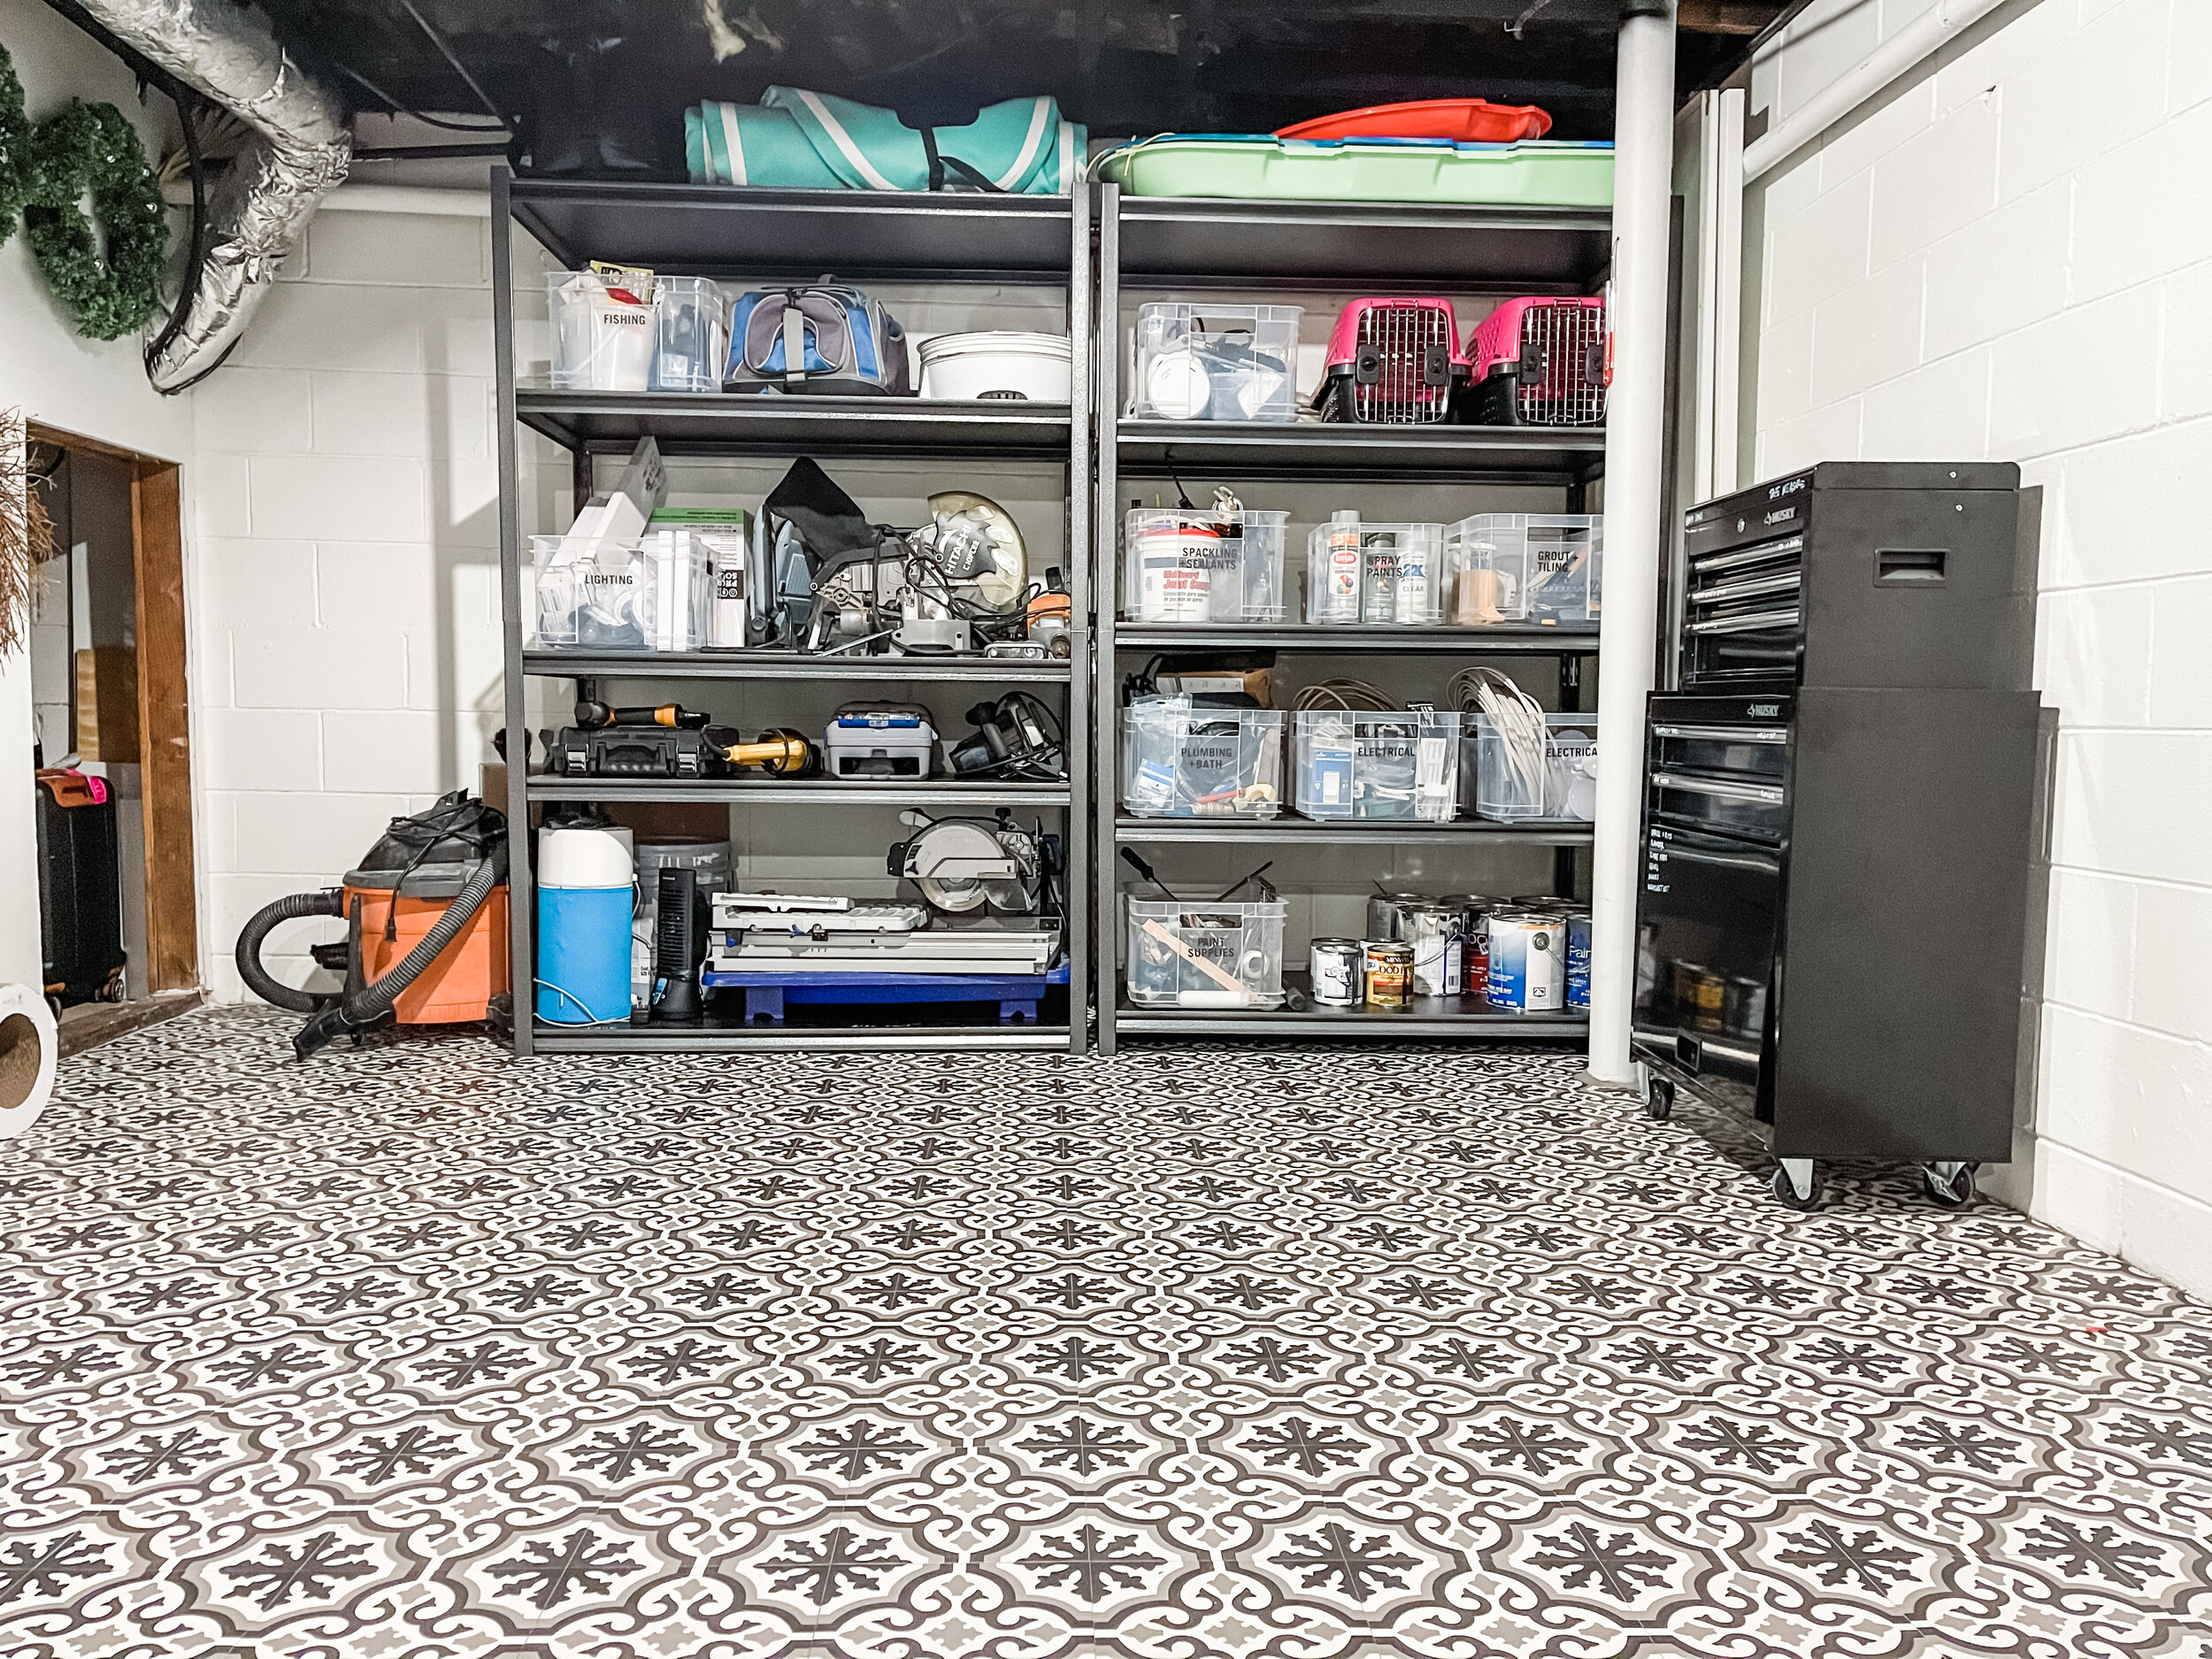
This area required a whole lot of measuring and we hit a few bumps along the way but we have more storage than before and can find what we need. Here are two things that didn’t go as expected:
The gun cases and the climbing pads were too deep to fit on the shelves. This was an error on my part because I broke my own rule and eye-balled them rather than measuring them against the shelving. It turns out to be a blessing though, because we have storage for both in a separate area that makes more sense.
I also underestimated the amount of fishing gear that would need to be stored. I allocated one spot and needed more. Luckily the wet saw was smaller than expected and I was able to win back some space there.
“Moral of the story: MEASURE. MEASURE. MEASURE.”
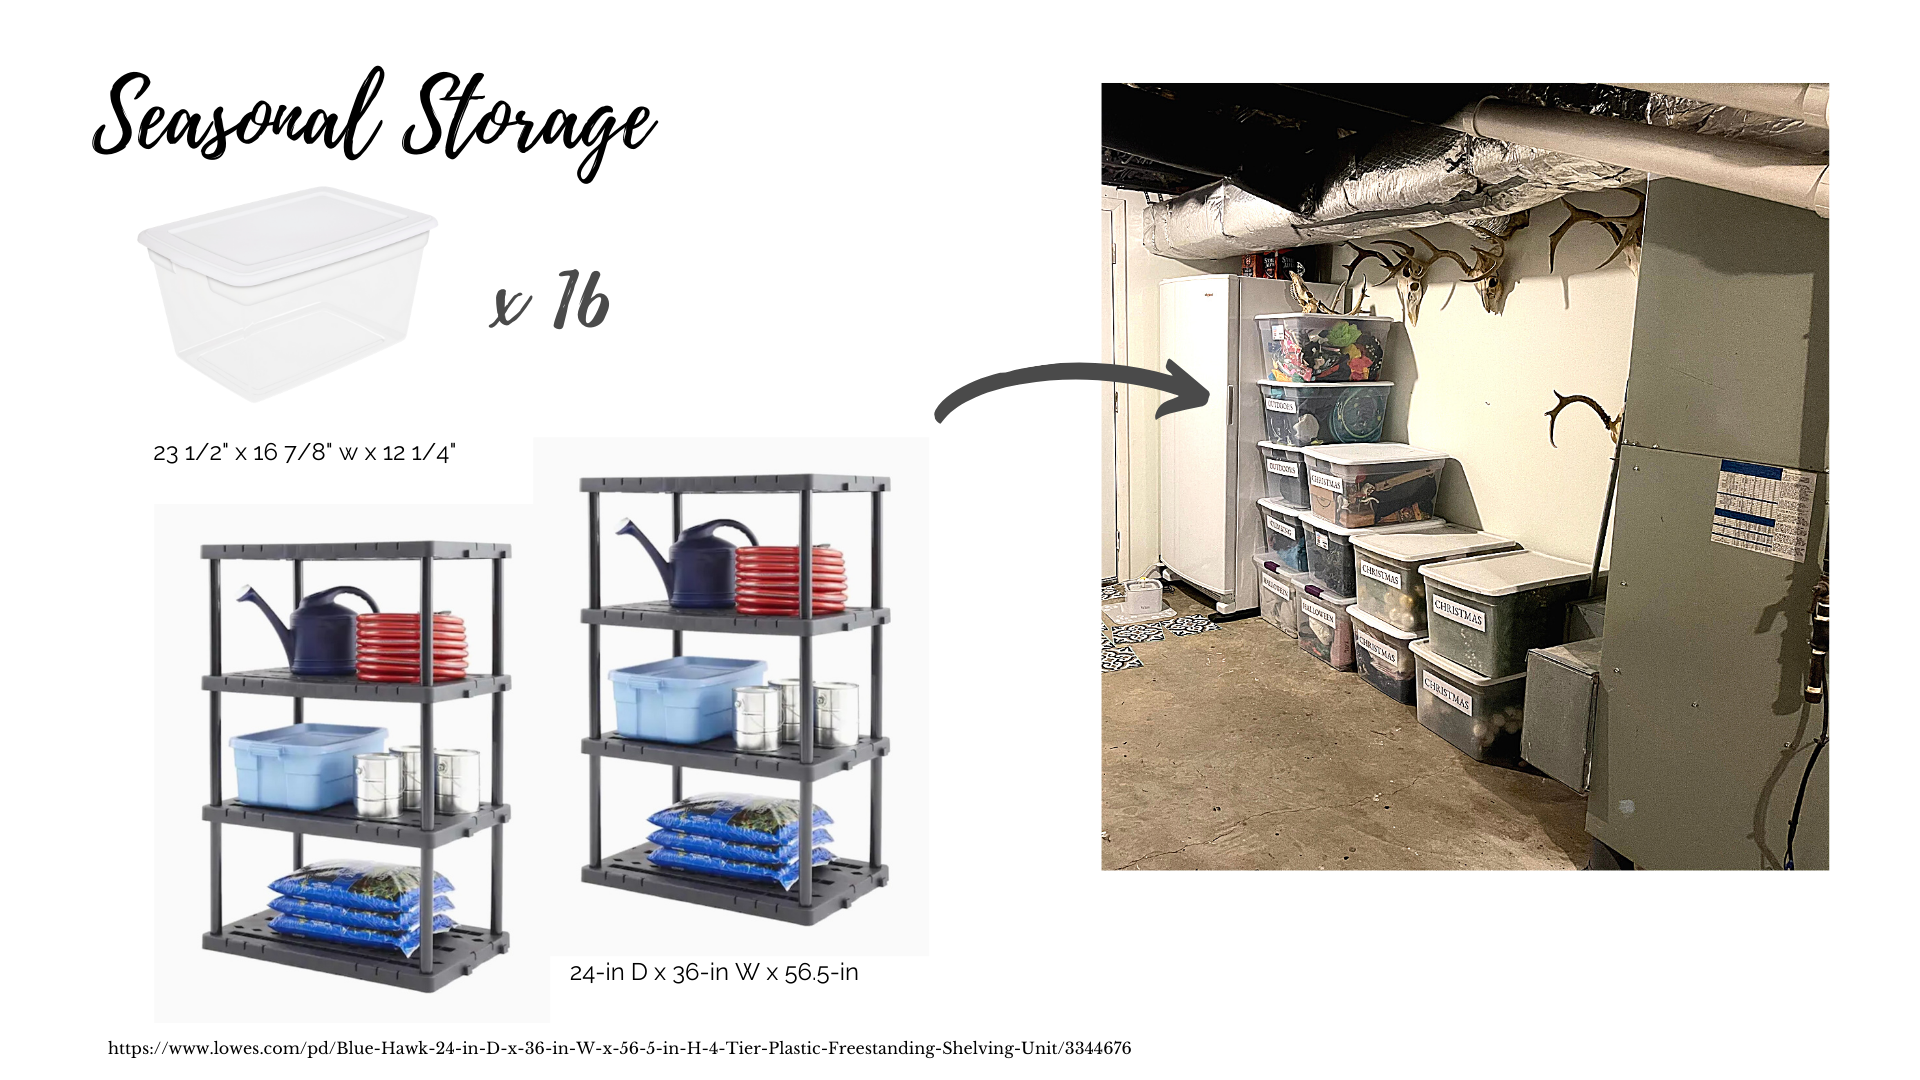
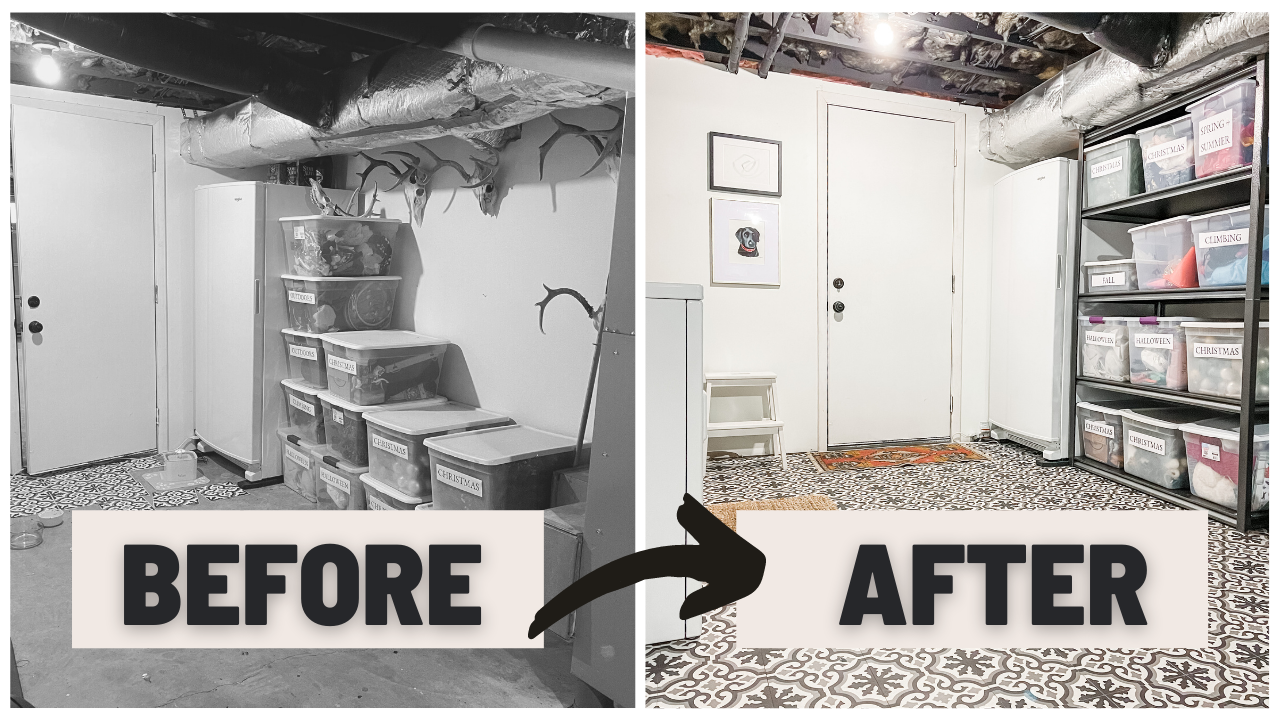
ZONE 3: SEASONAL STORAGE
If you follow me on instagram, then you have seen part of this project before. I started on the bins for this project after Thanksgiving. Now they finally have a resting place and I am thrilled!

This area goes to show that even when you measure sometimes things are different than they appear online. Thankfully we went to the store to see these shelves before purchasing. I found out that the poles on the storage units were so wide that even with the extra breathing room I estimated, the bins were not going to fit well.
We ended up using the same shelving units from the tool area. Admittedly, it is a little tight with three bins across but we do not access them regularly. We had a lot of trouble finding the right size storage unit for this area given its low ceiling height, the obstacle of the air vent and the overall width with the freezer and our budget. All that to say, we are happy with how it turned out and glad to have matching storage shelves in the event we move.

Last but not least I want to share the cost of the project.
Flooring: $550
Metal Shelving: $330
Bins: $230
Laundry Wardrobe: $240
Smoke Bins: $40
Broom Holder: $15
Large Clear Storage Bins: $60
Rugs: Already Owned
Art: Already Owned
Stool: Already Owned
TOTAL: $1465
So what do you think of the final reveal? We are so happy with this space and laundry is almost enjoyable (almost).
xx
Caro
