

Inside All Our (Super Organized) Drawers + Cabinets in the Kitchen
I’m sharing an inside look at how I organized our drawers and cabinets in the kitchen. Including which products we used and how to store EVERY SINGLE THING (even kids cups and plates!) in the most efficient, useful and beautiful way possible. The best part is I’m doing it Room Raiders style so you can inspect every cabinet and drawer. I didn’t zhoosh or prep the spaces. I just opened the drawers and snapped the pix so you will get a real life feel of our organizing systems. I hope this will help you get some ideas for your own home and that you will see that products are used sparingly and only where they truly aid me in staying organized.
This is a mega two-part post so here’s how I’ve laid it out:
I'll link all of the products I used under each photo and at the end of the post.
I’m sharing the cabinet, location, and overall purpose of that cabinet and then next to or below will be a picture of what it looks like inside.
I’ve divided this into two posts: the main kitchen area (we have a 1 butt kitchen) and the pantry/dining area (this is where we added a built-in for addiitonal storage). I’ll share an overview of how I decided what went where and then you’ll get to peek inside each and every cabinet and drawer.
Are you ready?
kitchen cabinets: zones
First, I’m going to share the different zones in my kitchen and dining area so you can get an idea of the lay of the land and get helpful ideas for your own kitchen. I love to use post its to do this before I unpack my kitchen and when I’m organizing for friends. Defining zones, makes it easier to break each area down as its own organizing project so I don’t get overwhelmed, and ensures I prioritize function.


If you are setting up your kitchen, I like to think about Six Sigma and LEAN processes. Eliminate waste to focus on cooking rather than wandering to three different places to find things. Here are the main zones I like to start with in the kitchen:
baking
cooking
food storage
cleaning
pantry
coffee/tea
utility
backstock
everyday
entertaining
trash/recycling
You may have more than one cabinet or drawer dedicated to each zone depenidng on how big your kitchen is and how many wares you have. You may also want to account for additional categories. but I do suggest starting out broad. Most items can fit into one of these categories above.
cooking zone:

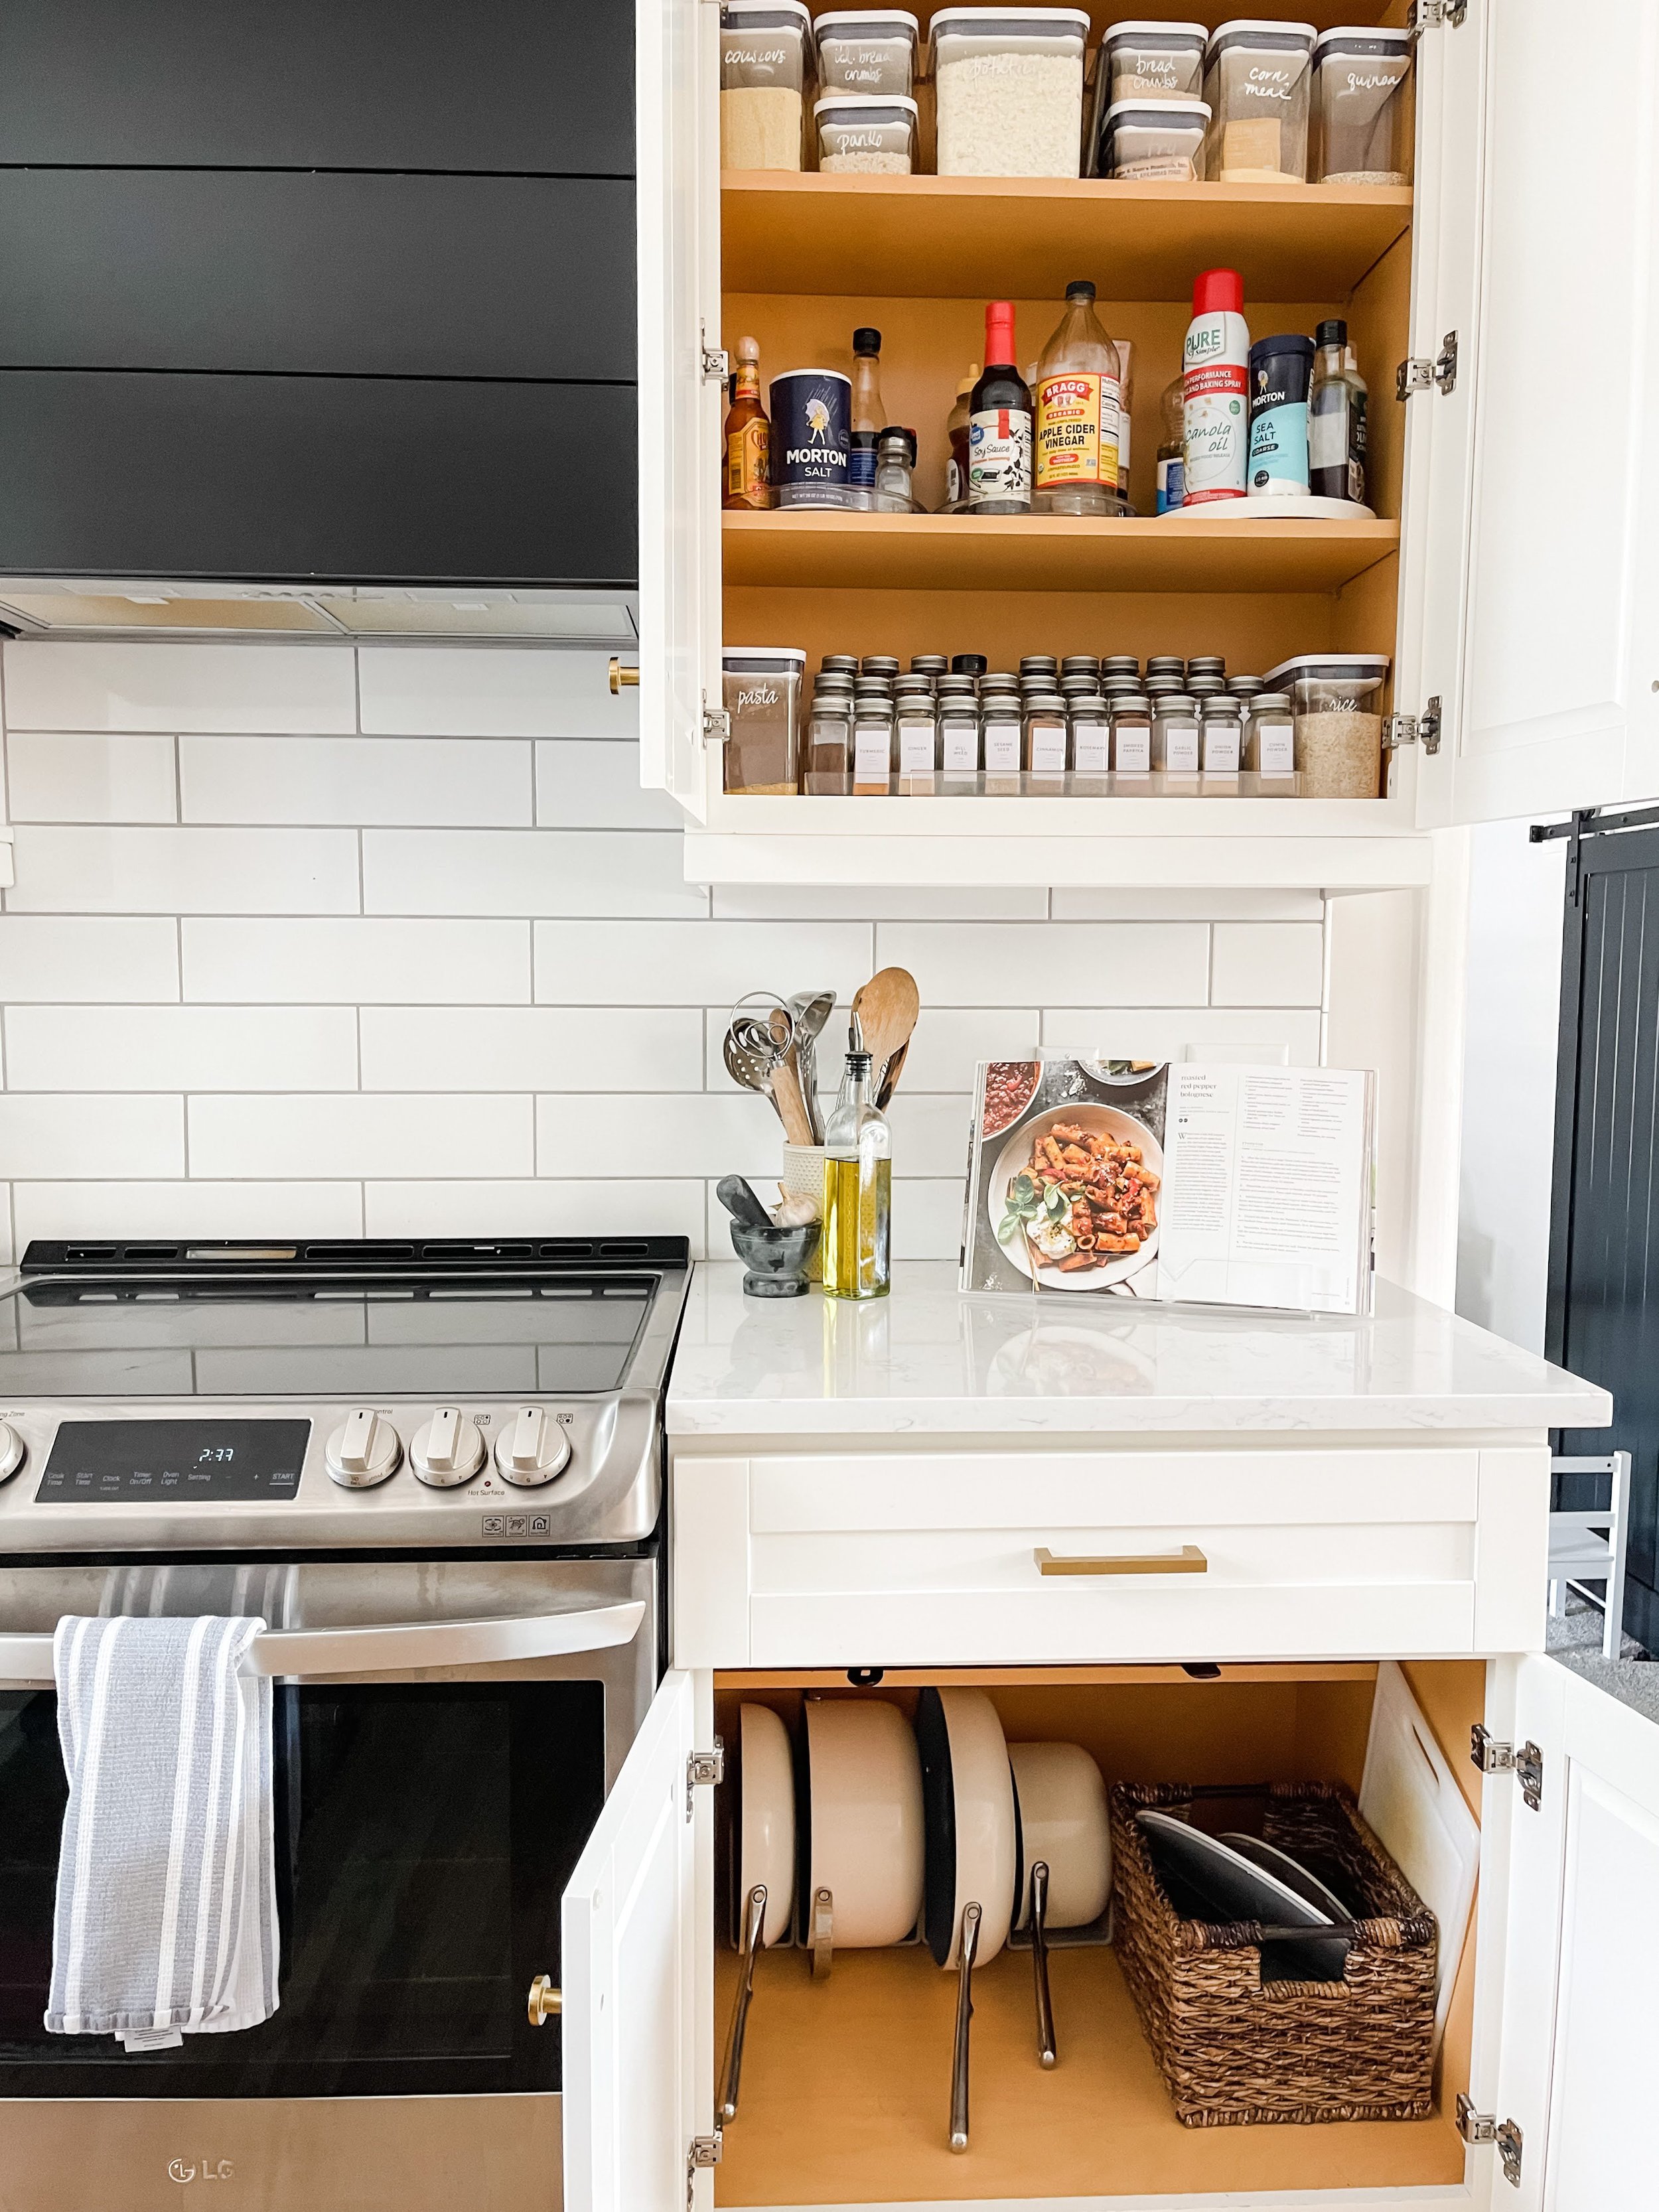
COOKBOOK STAND | COFFEE JAR | CARAWAY PANS | SPICE JARS | SPICE LABELS | TURNTABLES | STORAGE CONTAINERS
The cooking zone is the hardest working area in our home. Only second to the “cleaning zone” where I load and unload the dishwasher 5000 times a day (more on that later!). Generally this area is directly around your stove so that you have everything you need to “cook” in reach. We use the double cabinet to the right of the stove for all of our grains, spice, oils and vinegars. Since we only have one drawer near the cooking area, I use a medium sized container for wood and metal cooking utensils on the counter too.
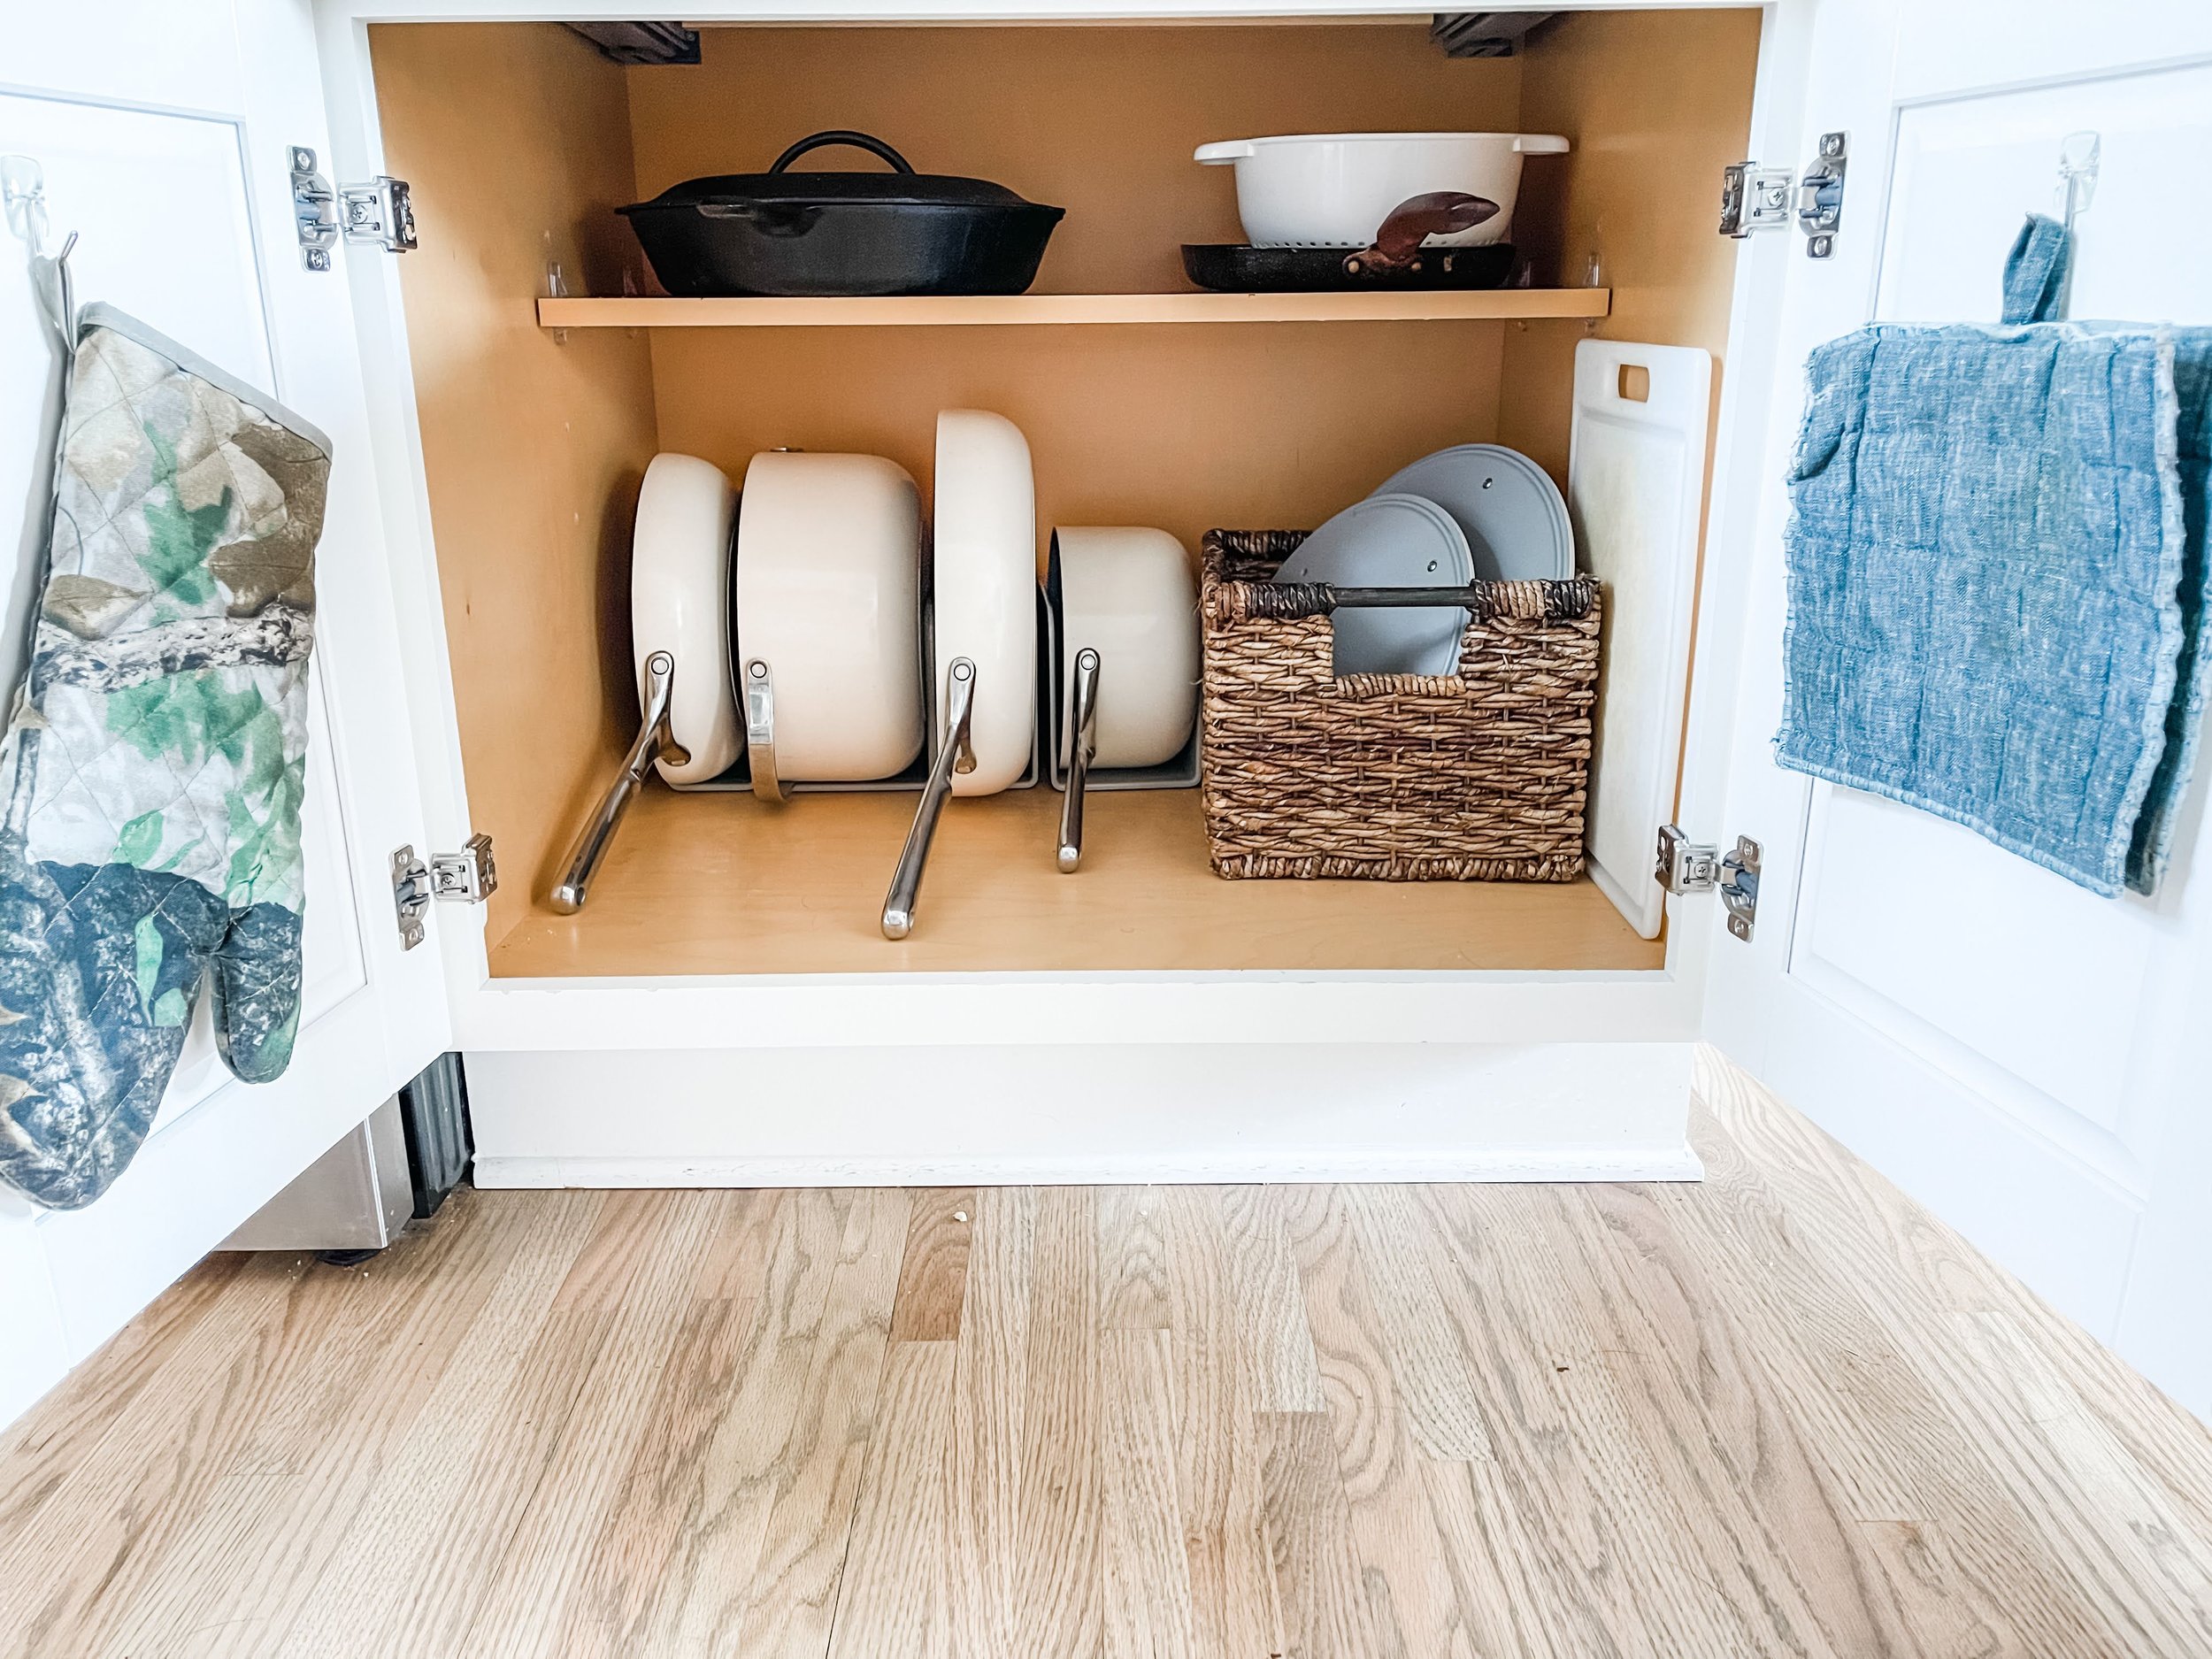
COMMAND HOOKS | POTS AND PANS | BASKET | CUTTING BOARD
Under the drawer, I have all of my Caraway pots, pans and tops, plus an egg pan and cast iron skillet and collander. Although the Caraway pans come with a lid holder, it was too long for my cabinets so I improvised with a basket and it works really well. Finally, we use small command hooks for our pot holders conveniently located next to the stove. Last but not least, we store a few baking pans in the drawer under the oven (not shown!).
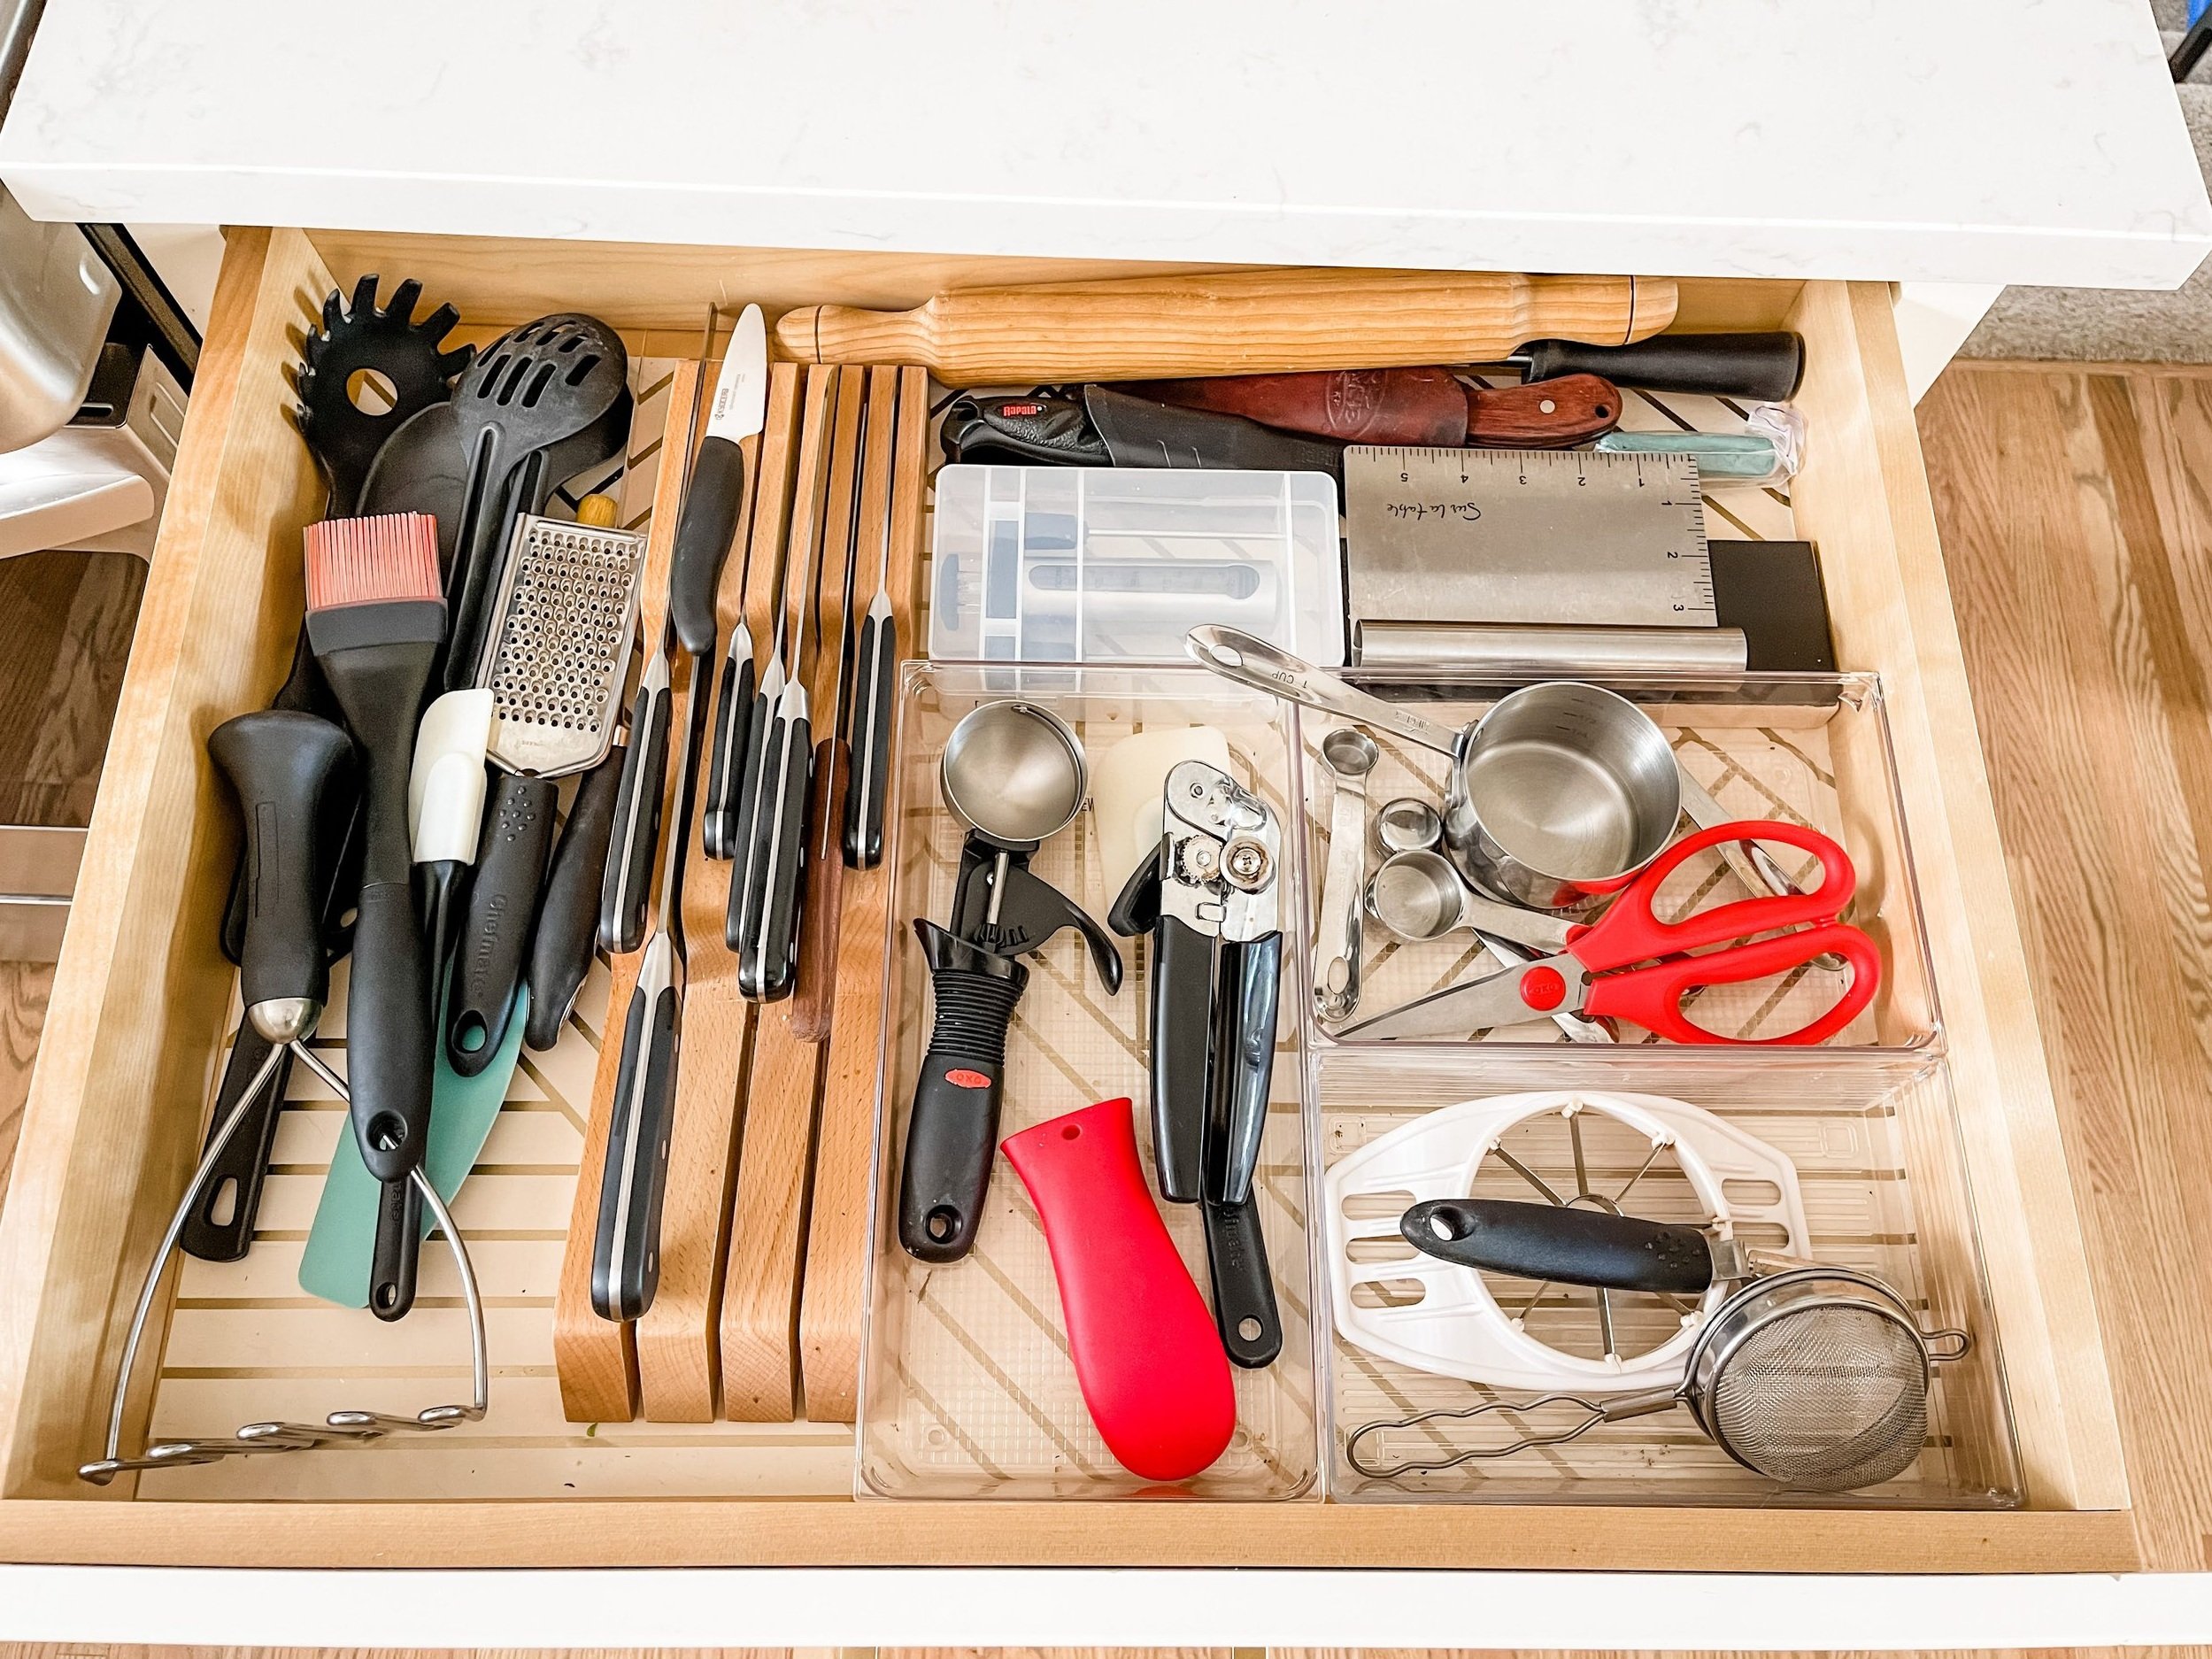
DRAWER LINER | KNIFE BLOCK | CLEAR DRAWER TRAYS
In the drawer next to the stove, we store all of our plastic cooking utensils (the ones I don’t think are pretty enough to look at all the time!), a can opener, apple slicer, strainer, peeler, kitchen scissors, measuring cups and spoons, knives, rolling pin and a few other odds and ends. You will notice there are no duplicates, we just don’t have the space. Even though this drawer isn’t picture perfect, it works well for us, is not overcrowded and I can find what I need.
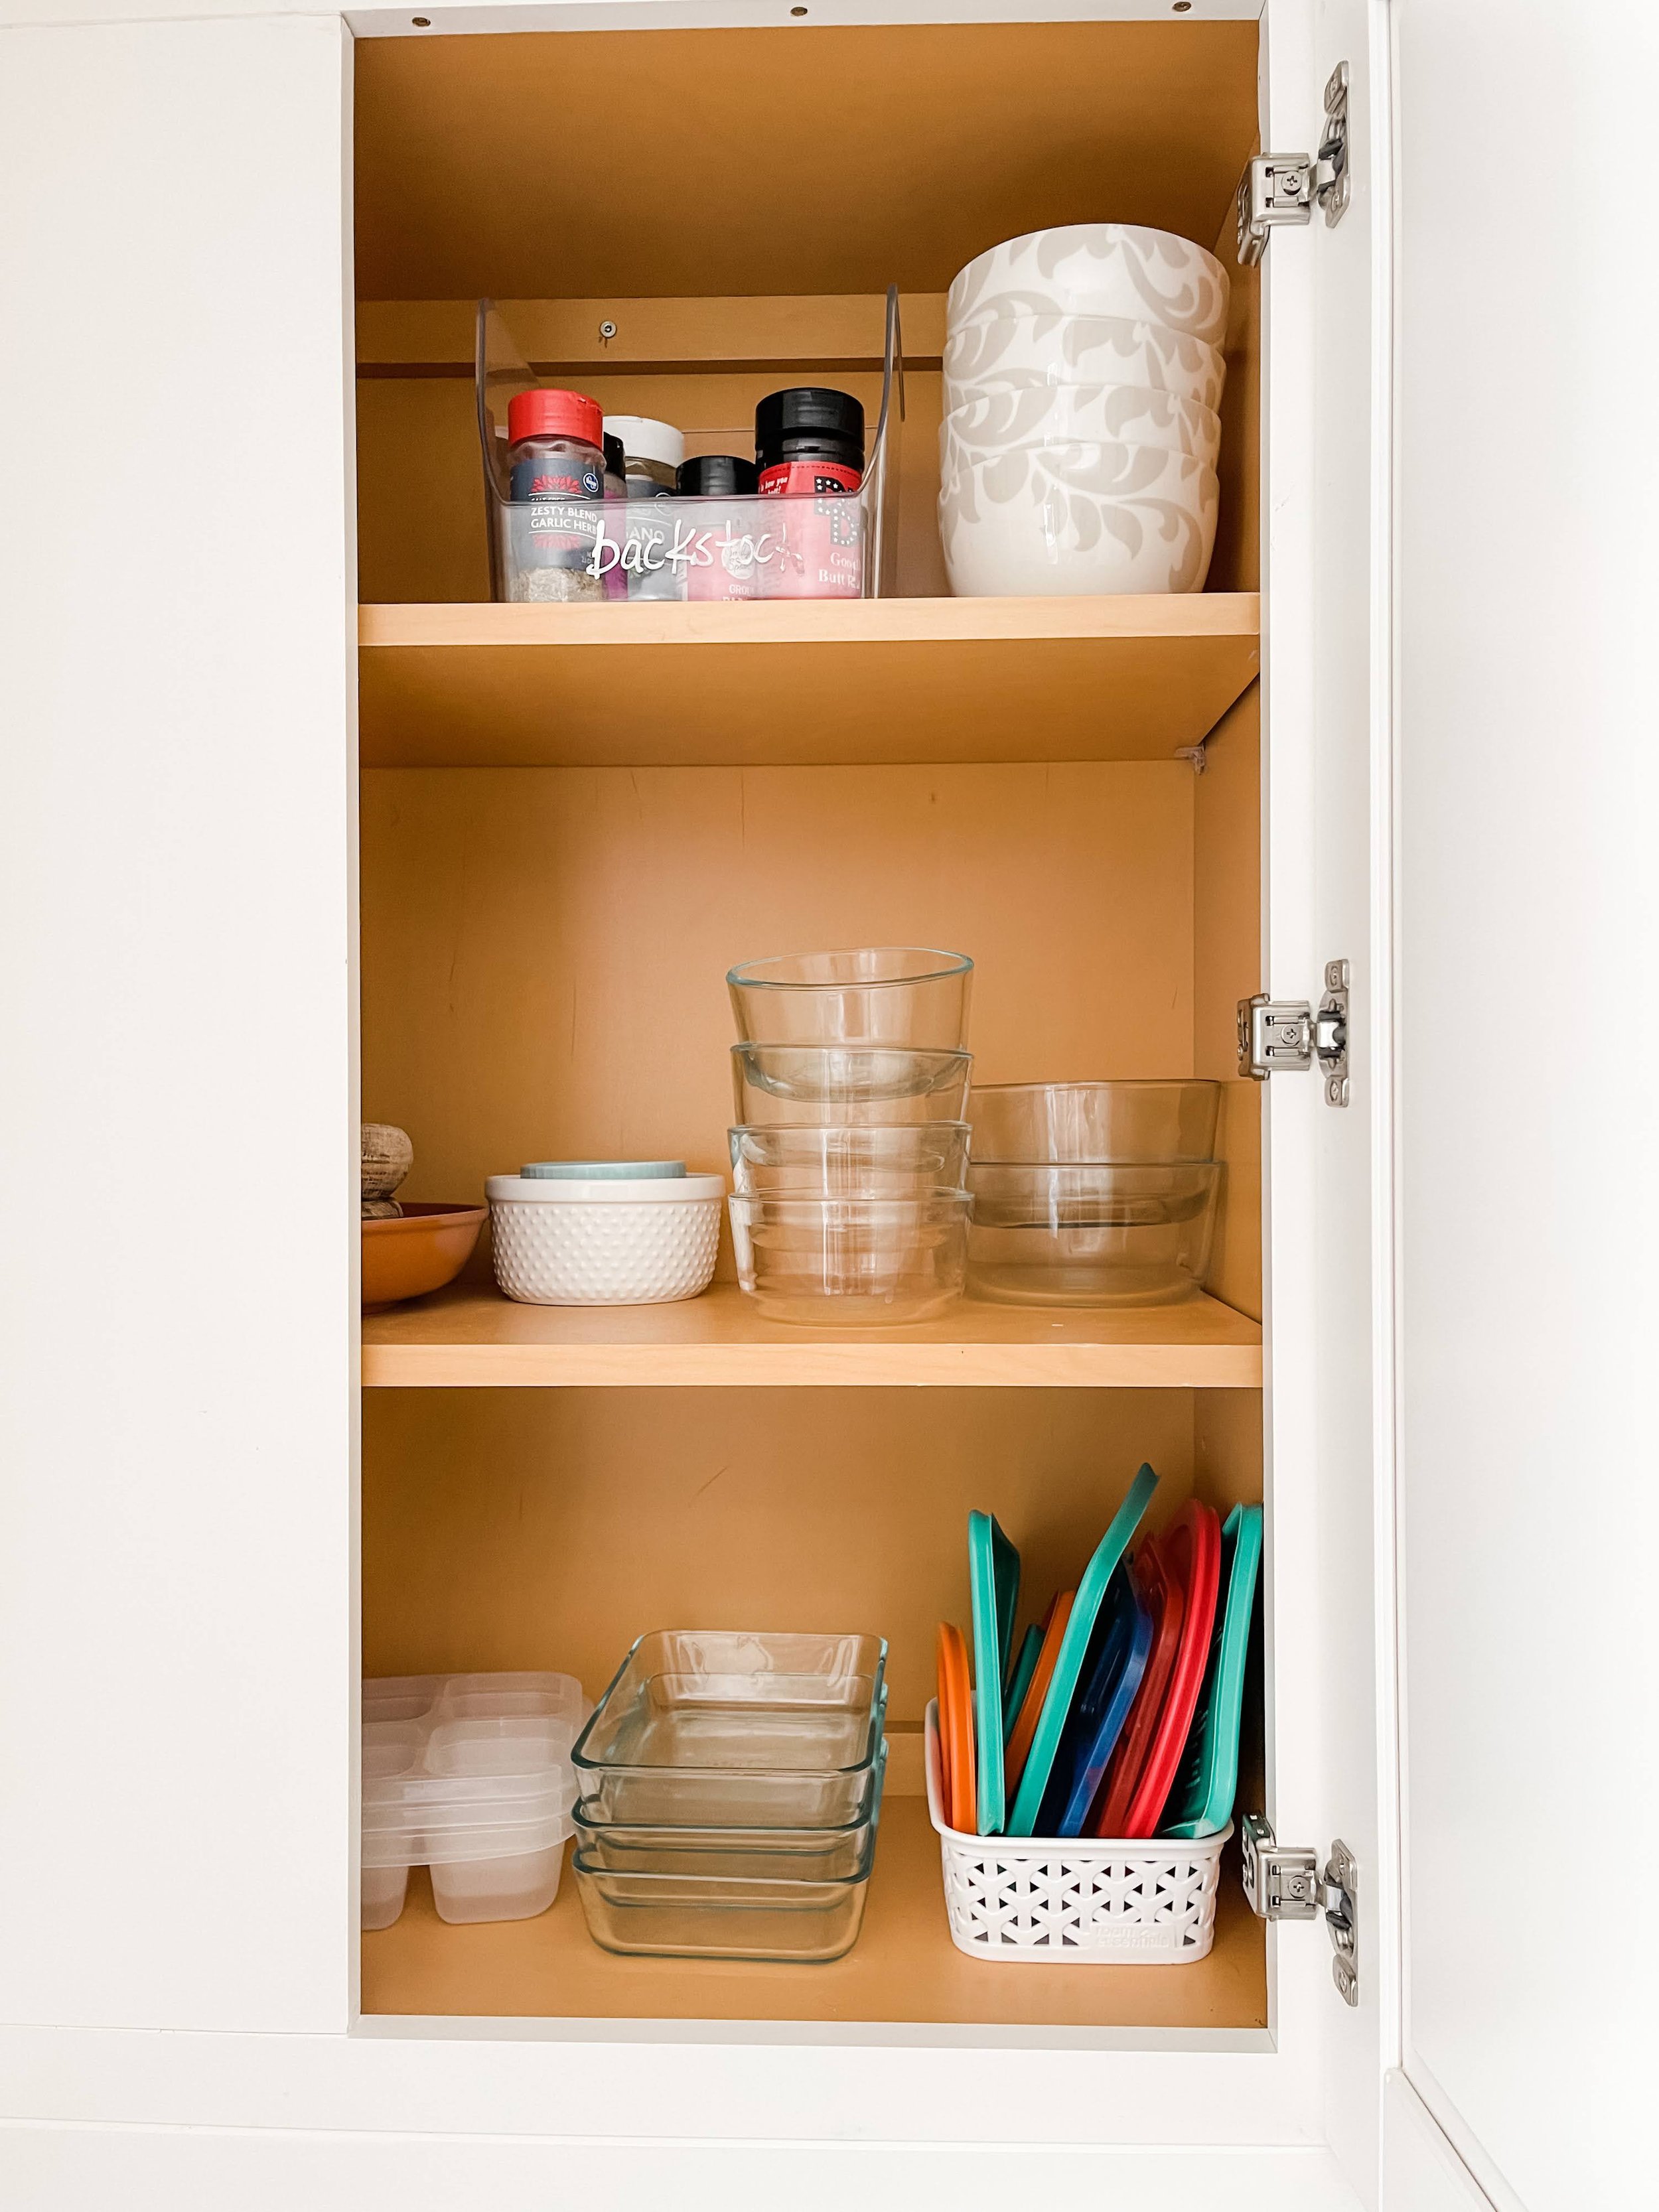
food storage + baking zones:

To the left of the stove is where I store our food storage containers. Orginally I had them in a deep drawer beside the microwave but we found that post-dinner clean up always happens around the stove and so placing the containers closer to the food made more sense. In the corner cabinet, I store our toaster. We use it almost everyday and I’m not a fan of keeping it on the counter. The remaining items in the lazy susan cabinet are all related to baking: bowls, flours, sugars, cookie cutters, etc. I do store my large stand mixer and hand mixer in a separate location (more on that in part two, pantry edition).

STORAGE CONTAINERS | Y-WEAVE BIN | WEDGE ORGANIZER | WHITE SPINNER | AIR TIGHT CONTAINERS
My storage solution for the food storage (left) is pretty simple. I just use a y-weave bin (under $3) for all the tops and then stack the glass containers. It helps that we invested in all glass storage containers so there are only a few sizes to contend with. The cabinet does extend further to the left but I don’t store anything back there because if I can’t see it, I won’t use it. On the very top shelf, I keep all of the backstock containers for my spices and a few extra bowls. When I run out of a spice, I check here first (“shop my backstock”) and refill from there if I can.
For the two tier lazy susan cabinet, I use a combination of spinners, storage containers and wedge organizers to keep things from getting lost in the back of the corner cabinet. On the top shelf, I store our toaster which we use everyday for breakfast. A stack of mixing bowls for baking and a pie dish. There is definietly breathing room on this shelf. On the bottom level, I have two wedge organizers to store cookie cutters on one side and baking decorations on the other side. I use a single spinner for corn starch, crisco and other baking condiments. Then I have air tight containers for flours and sugars.
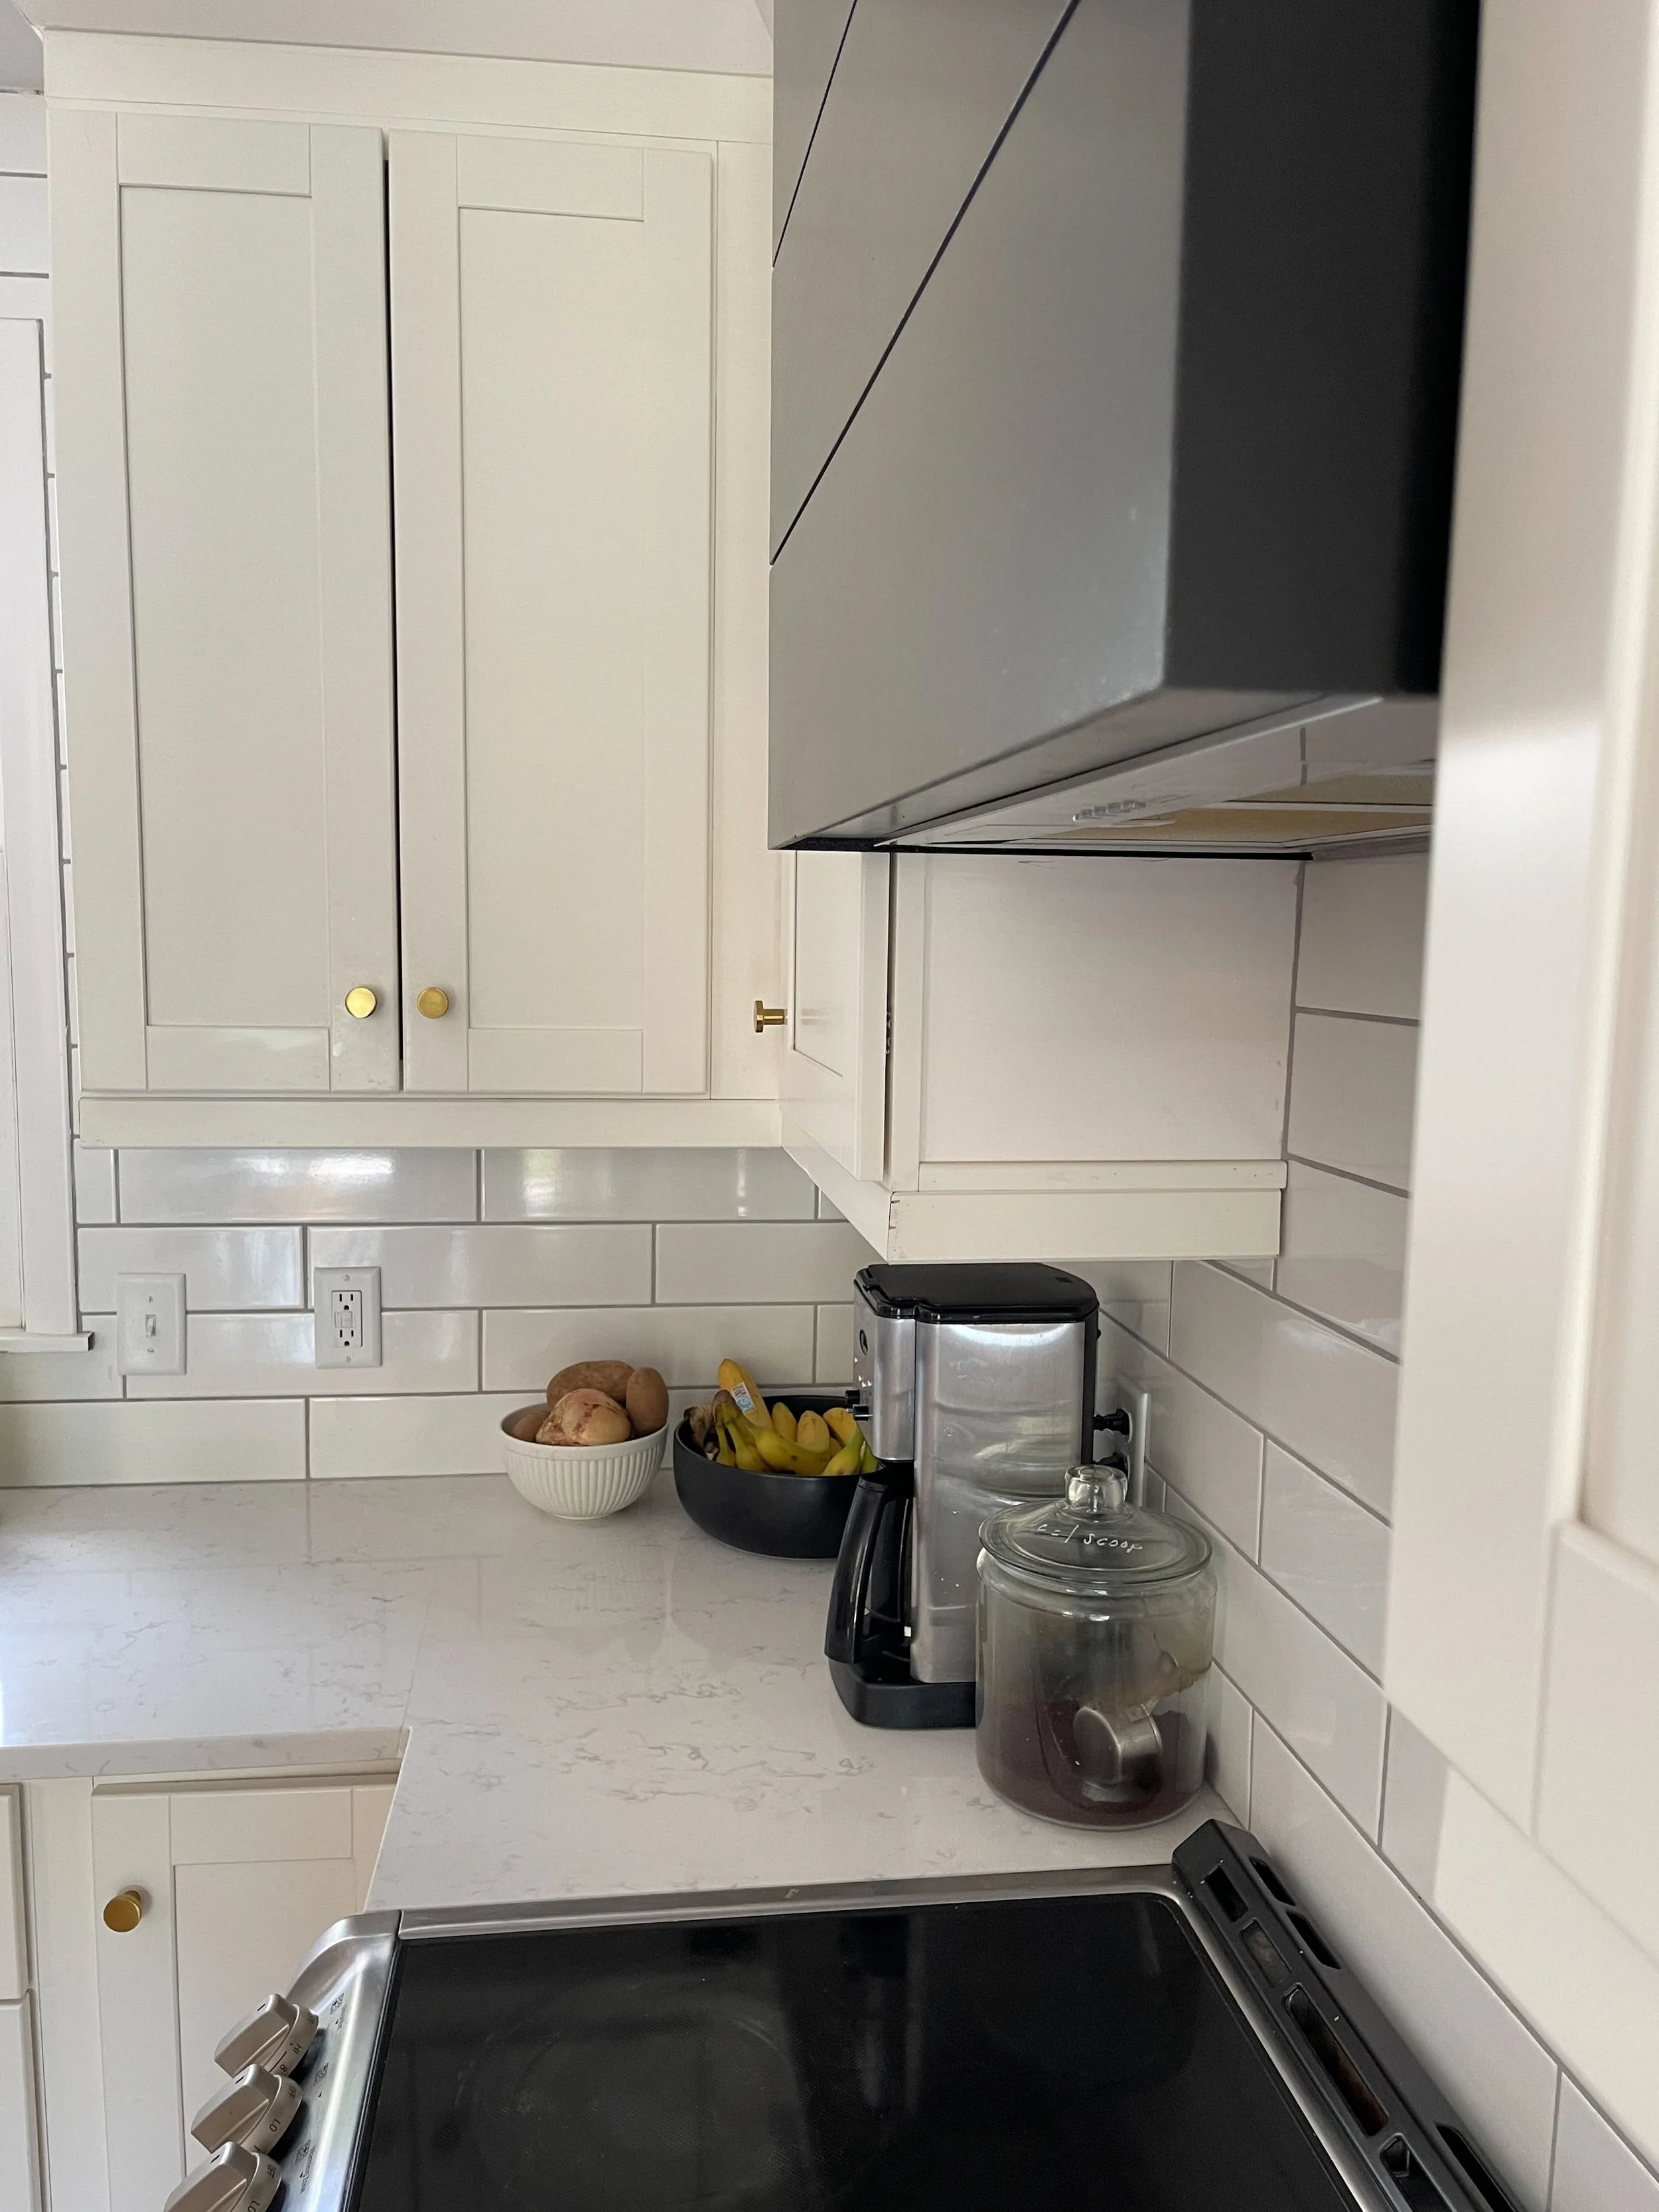
coffee + tea zone:

GLASS COFFEE CONTAINER | SHELF DIVIDER
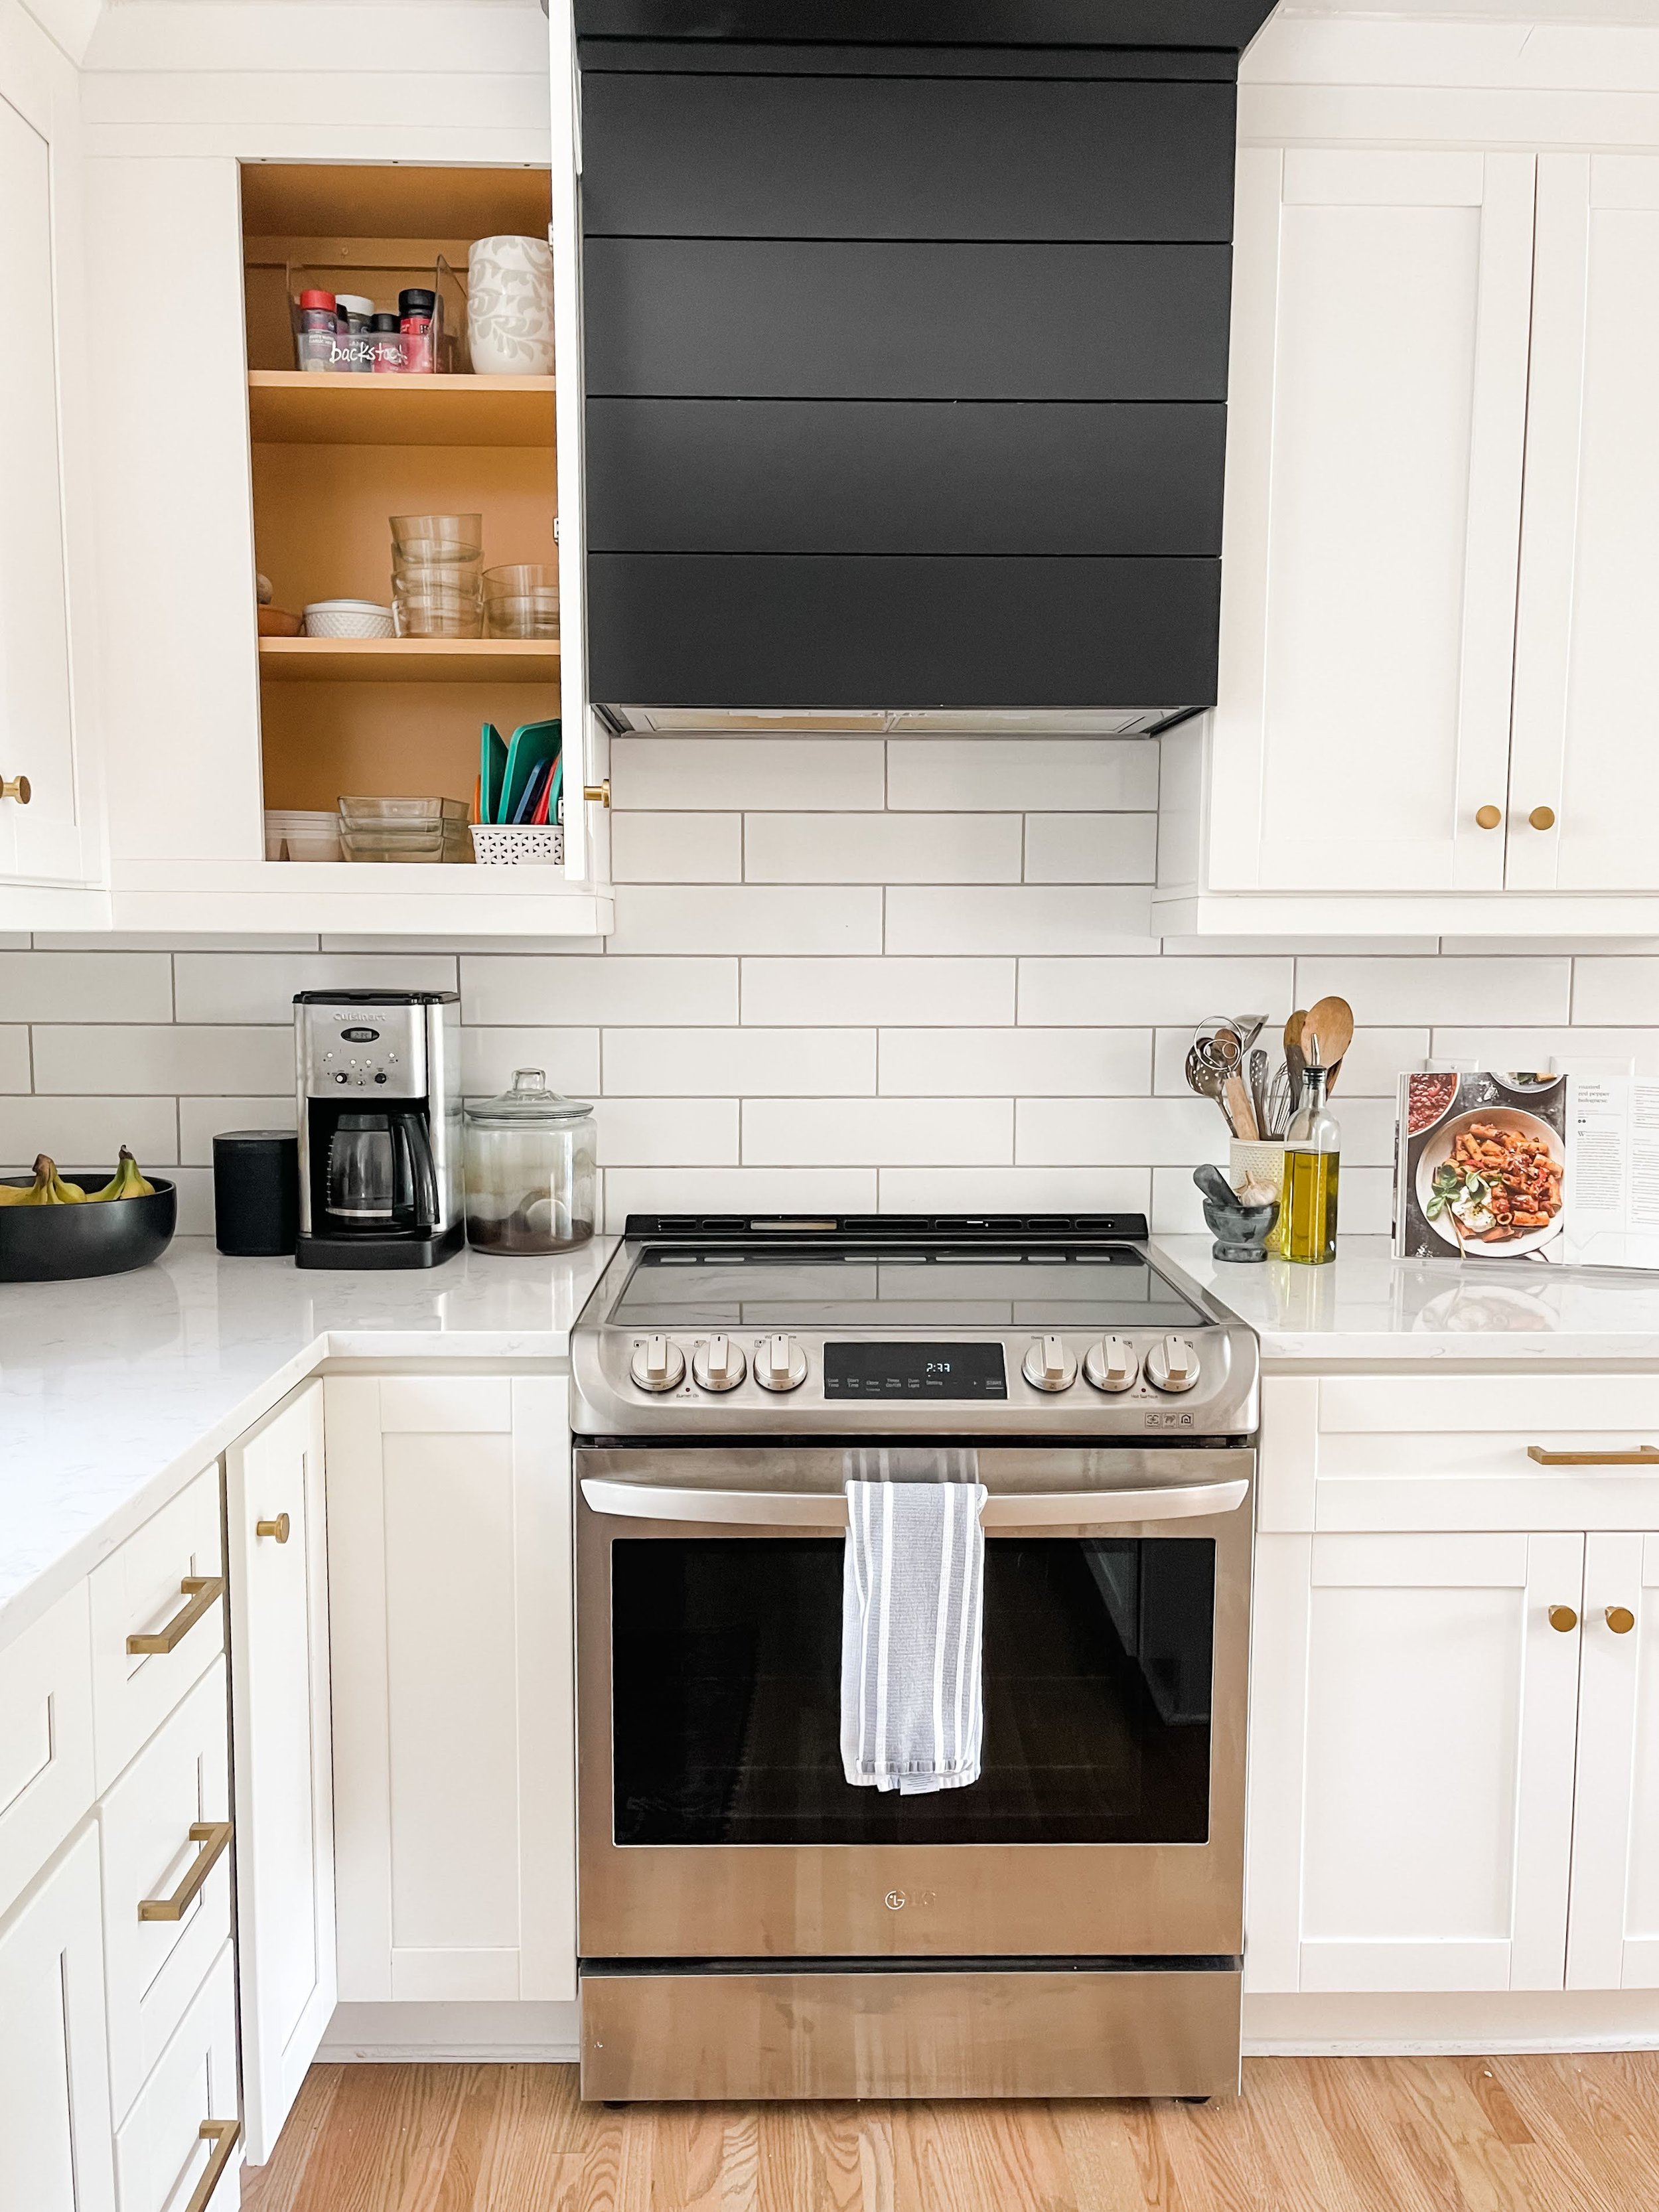
The coffee and tea zone is one cabinet very close to our coffee pot and coffee canister. Because we are are limited in cabinet space, I use a glass container on the counter to store our coffee. The surplus coffee lives in our pantry backstock area (can’t wait to show you in part 2!). In this same cabinet, I store the coffee filters and mugs so getting and making coffee is convenient. Above that, I have a “smoothie station.” Along with our toaster (in the lazy susan cabinet), this is a morning breakfast staple. I have all of the dry goods for our smoothies located here next to the blender. I guess you could also call this our “morning” station. Above that on the top shelf are less frequently used items - a coffee grinder, french press and a variety of tea in a clear storage container.
cleaning zone:

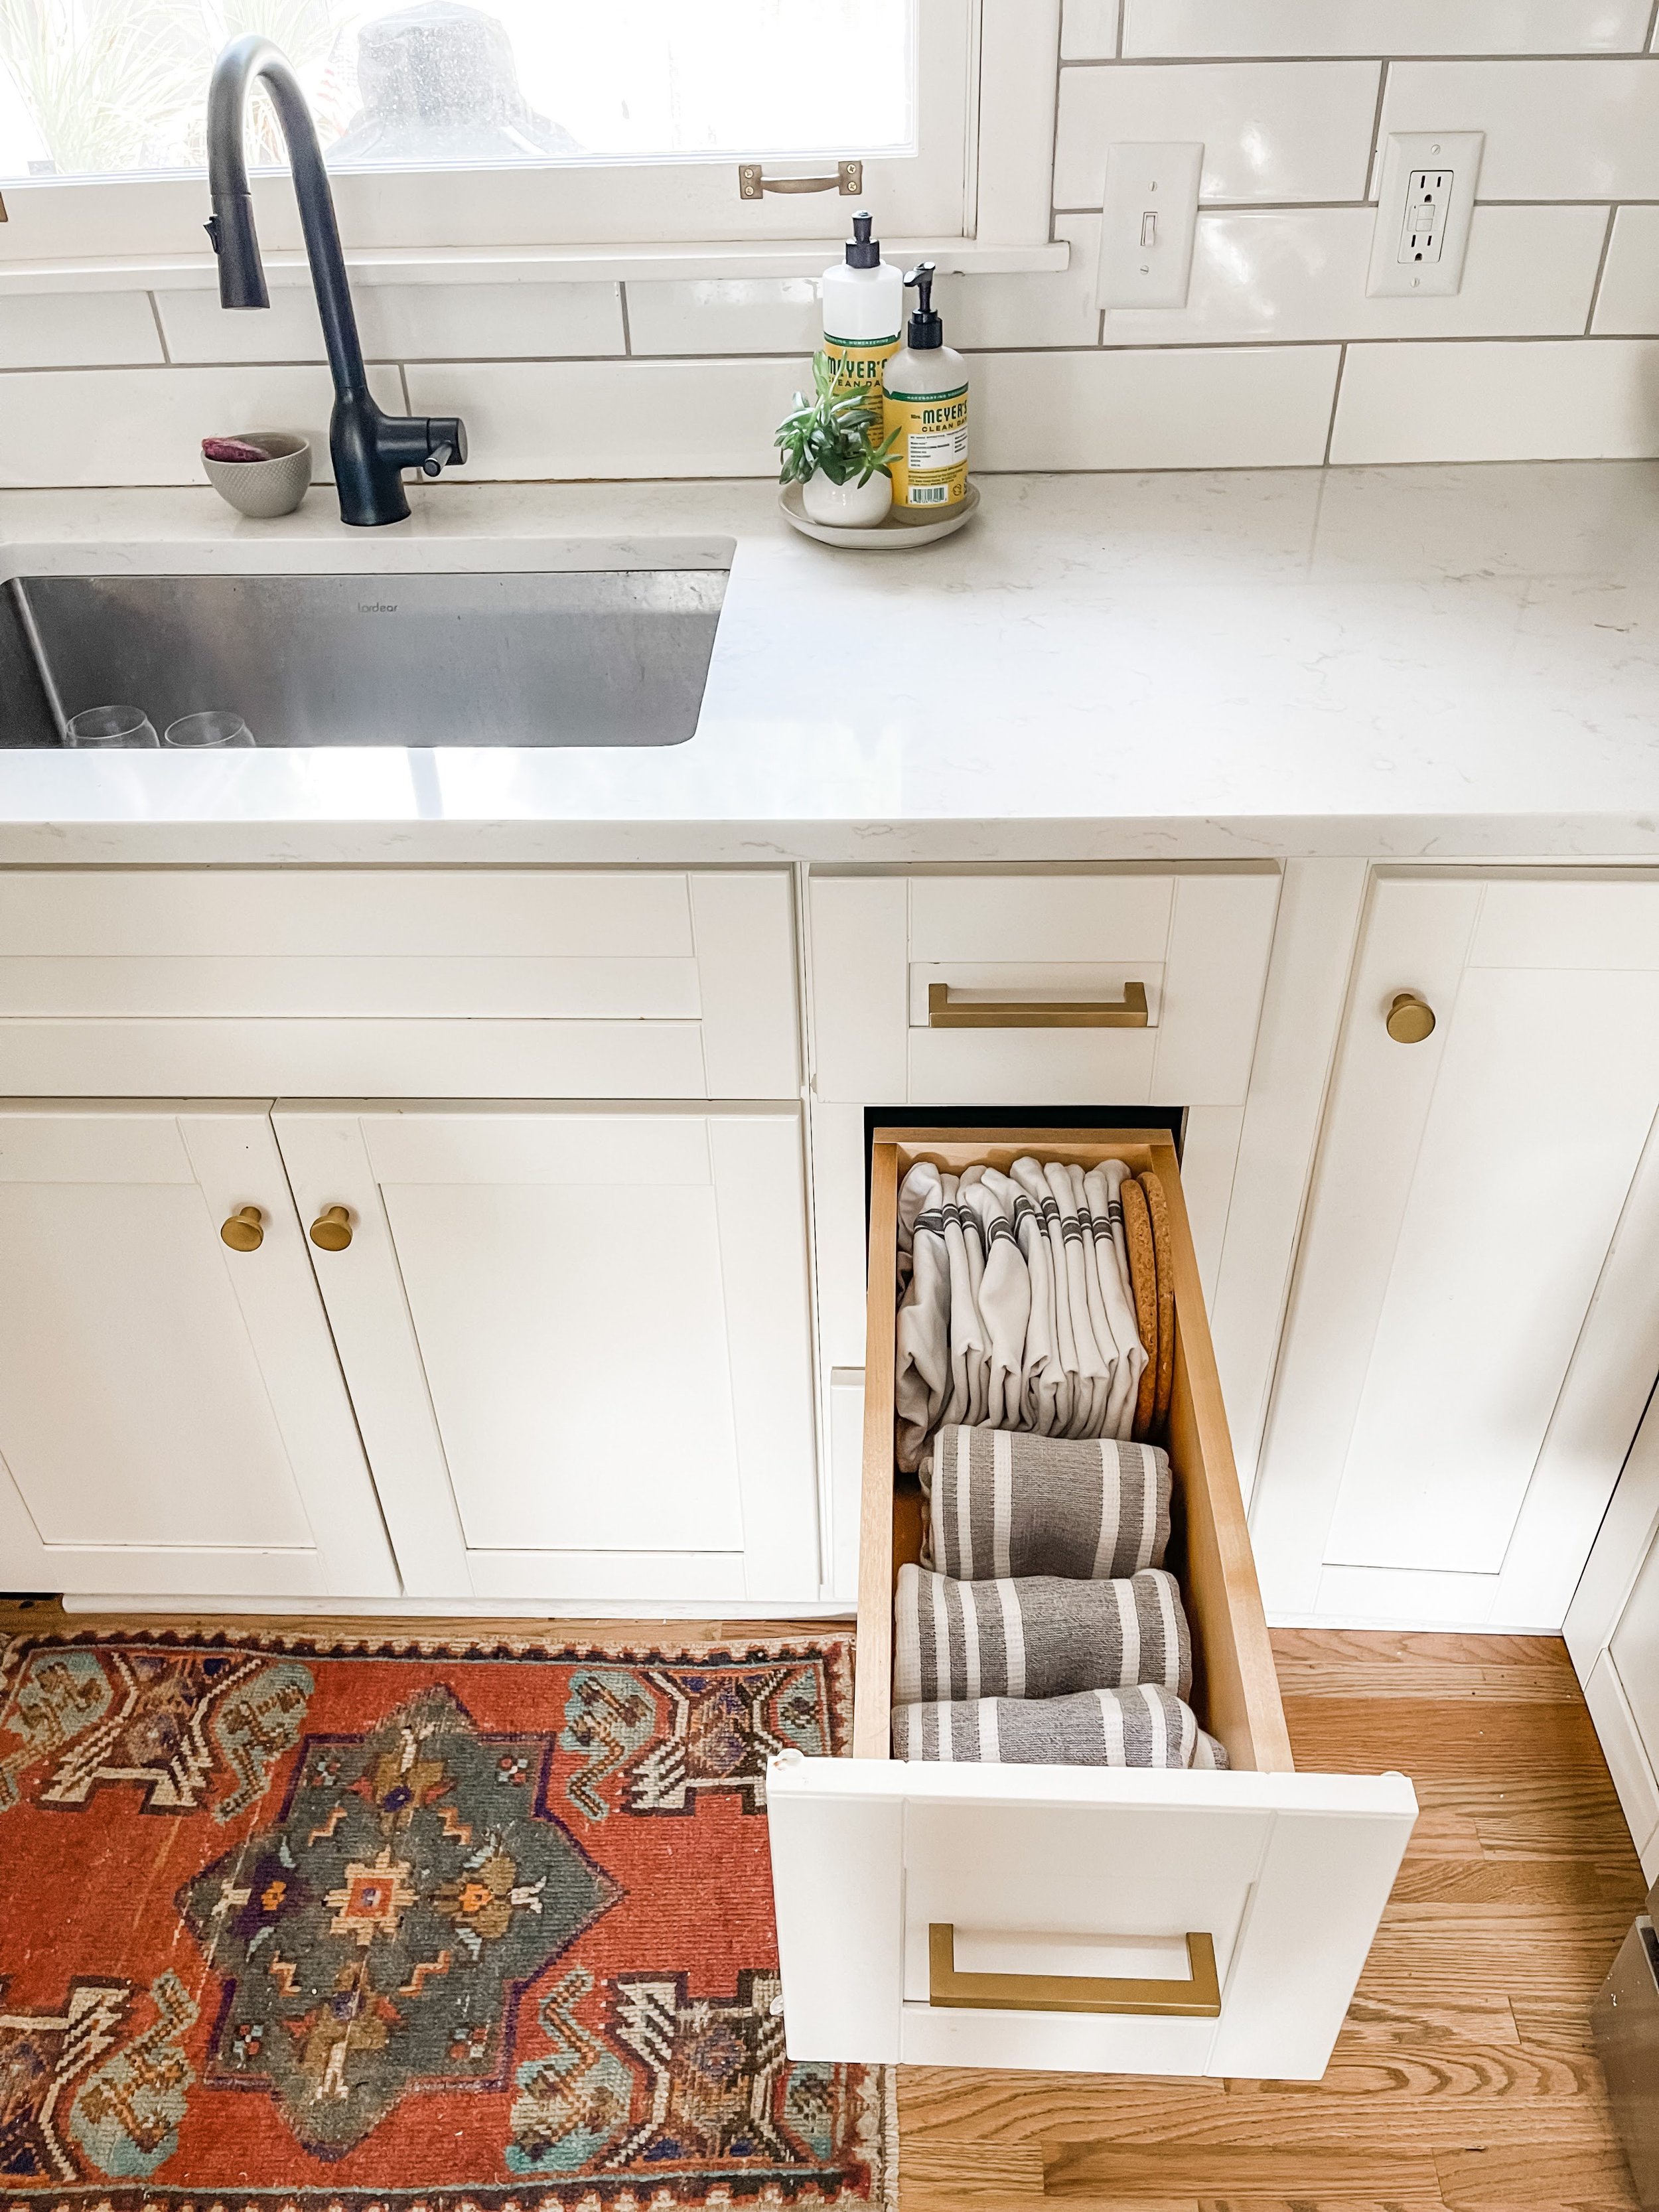

For the area next to and around the sink, I made it simple to get dishes into and out of the dishwasher. There is a three tier drawer bank next to the sink and here’s what I store in it:
Top Drawer: Dish Rags
Middle Drawer: Cloth Napkins (these are our everyday napkins) and nice dish towels
Lowest Drawer: Plastic Wrap, Bags and Foils

GIANT TURNTABLE | WEDGE DIVIDER | YELLOW SOAP
Under the sink I use a GIANT lazy susan to navigate around the disposal. In the lazy susan, I use another wedge organizer to further corral the little things like SOS pads, extra soaps and magic erasers. In the main part of the lazy susan, I keep cleaning supplies that I ONLY use in the kitchen like stainless steel cleaner, bar keeper’s friend for the sink, and dishwasher detergent. Next to the lazy susan I have extra drying pads and a fire extinguisher. And if you look really closely, in the way back you can see a giant bottle of blue dove for really greasy situations.
how to: make unloading the dishwasher easier

To the left of the sink is our dishwasher. I like to think about flow in the kitchen especially when it comes to loading and unloading the dishwasher. If you’re a parent, then you know how many times a day you load and unload the dishwasher. My priority for setting up the island and drawers and cabinets immediately around the dishwasher was to make it easy to unload everyday plates, silverware and cups from the dishwasher.
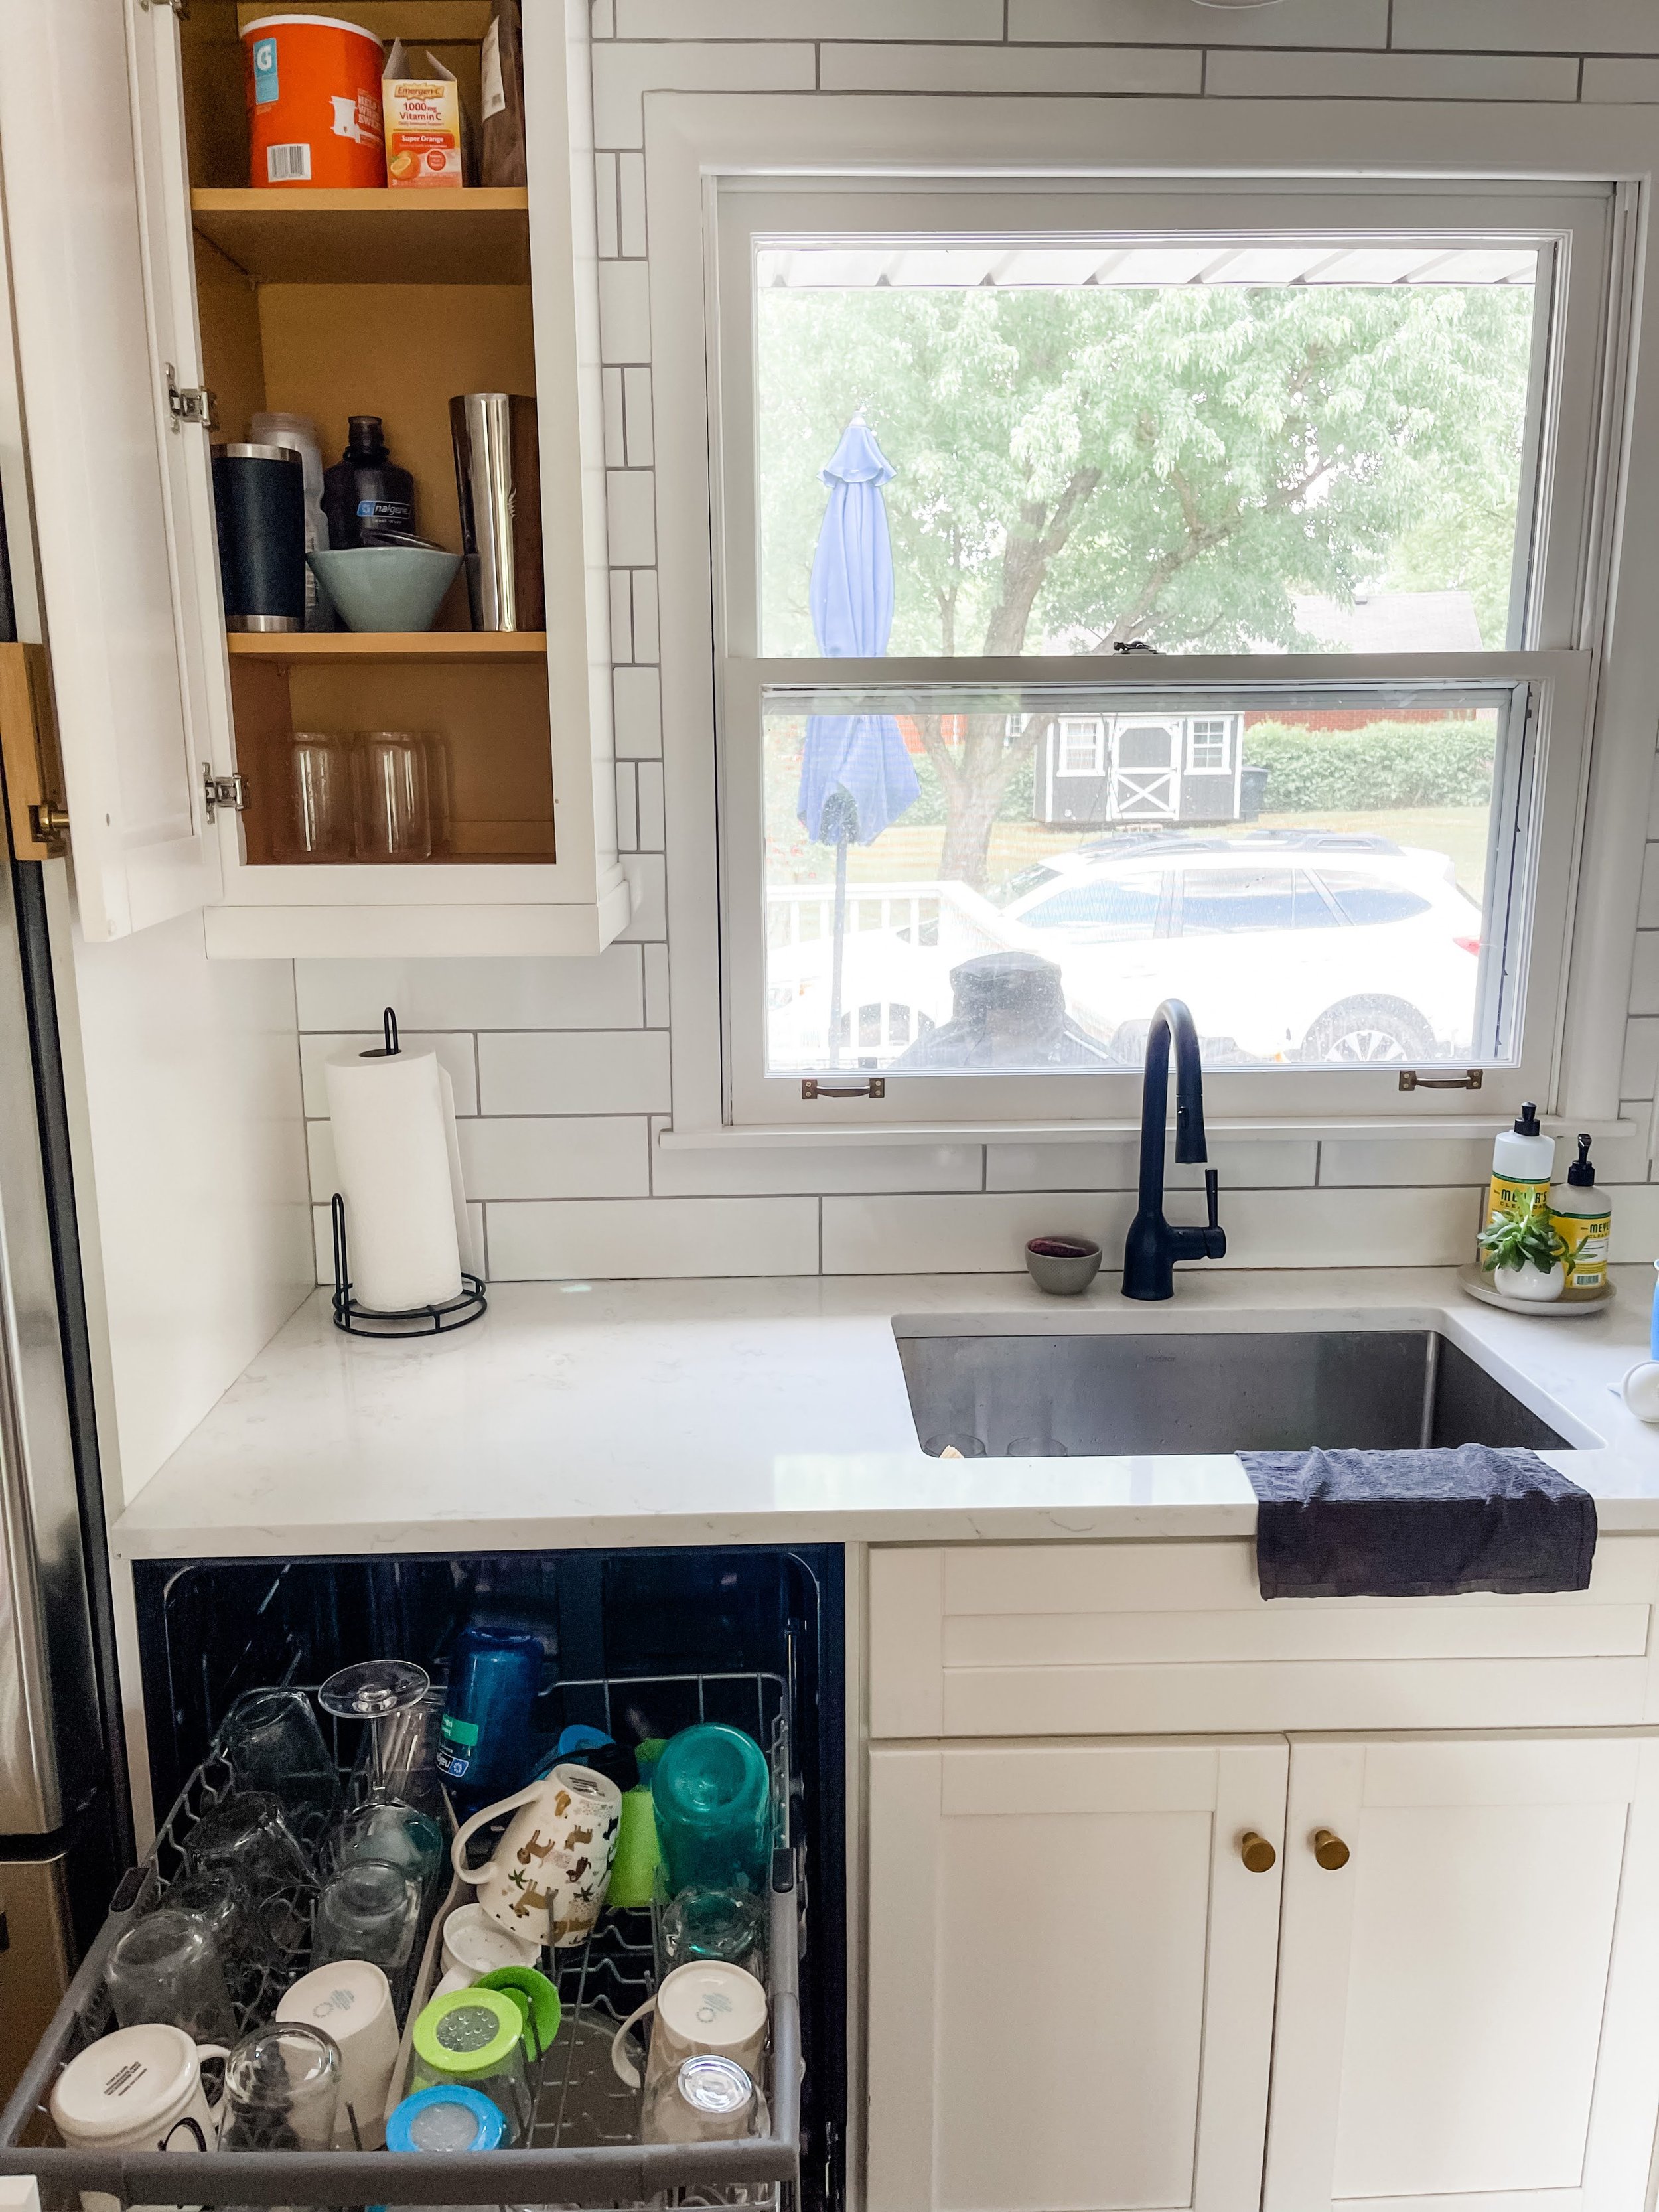

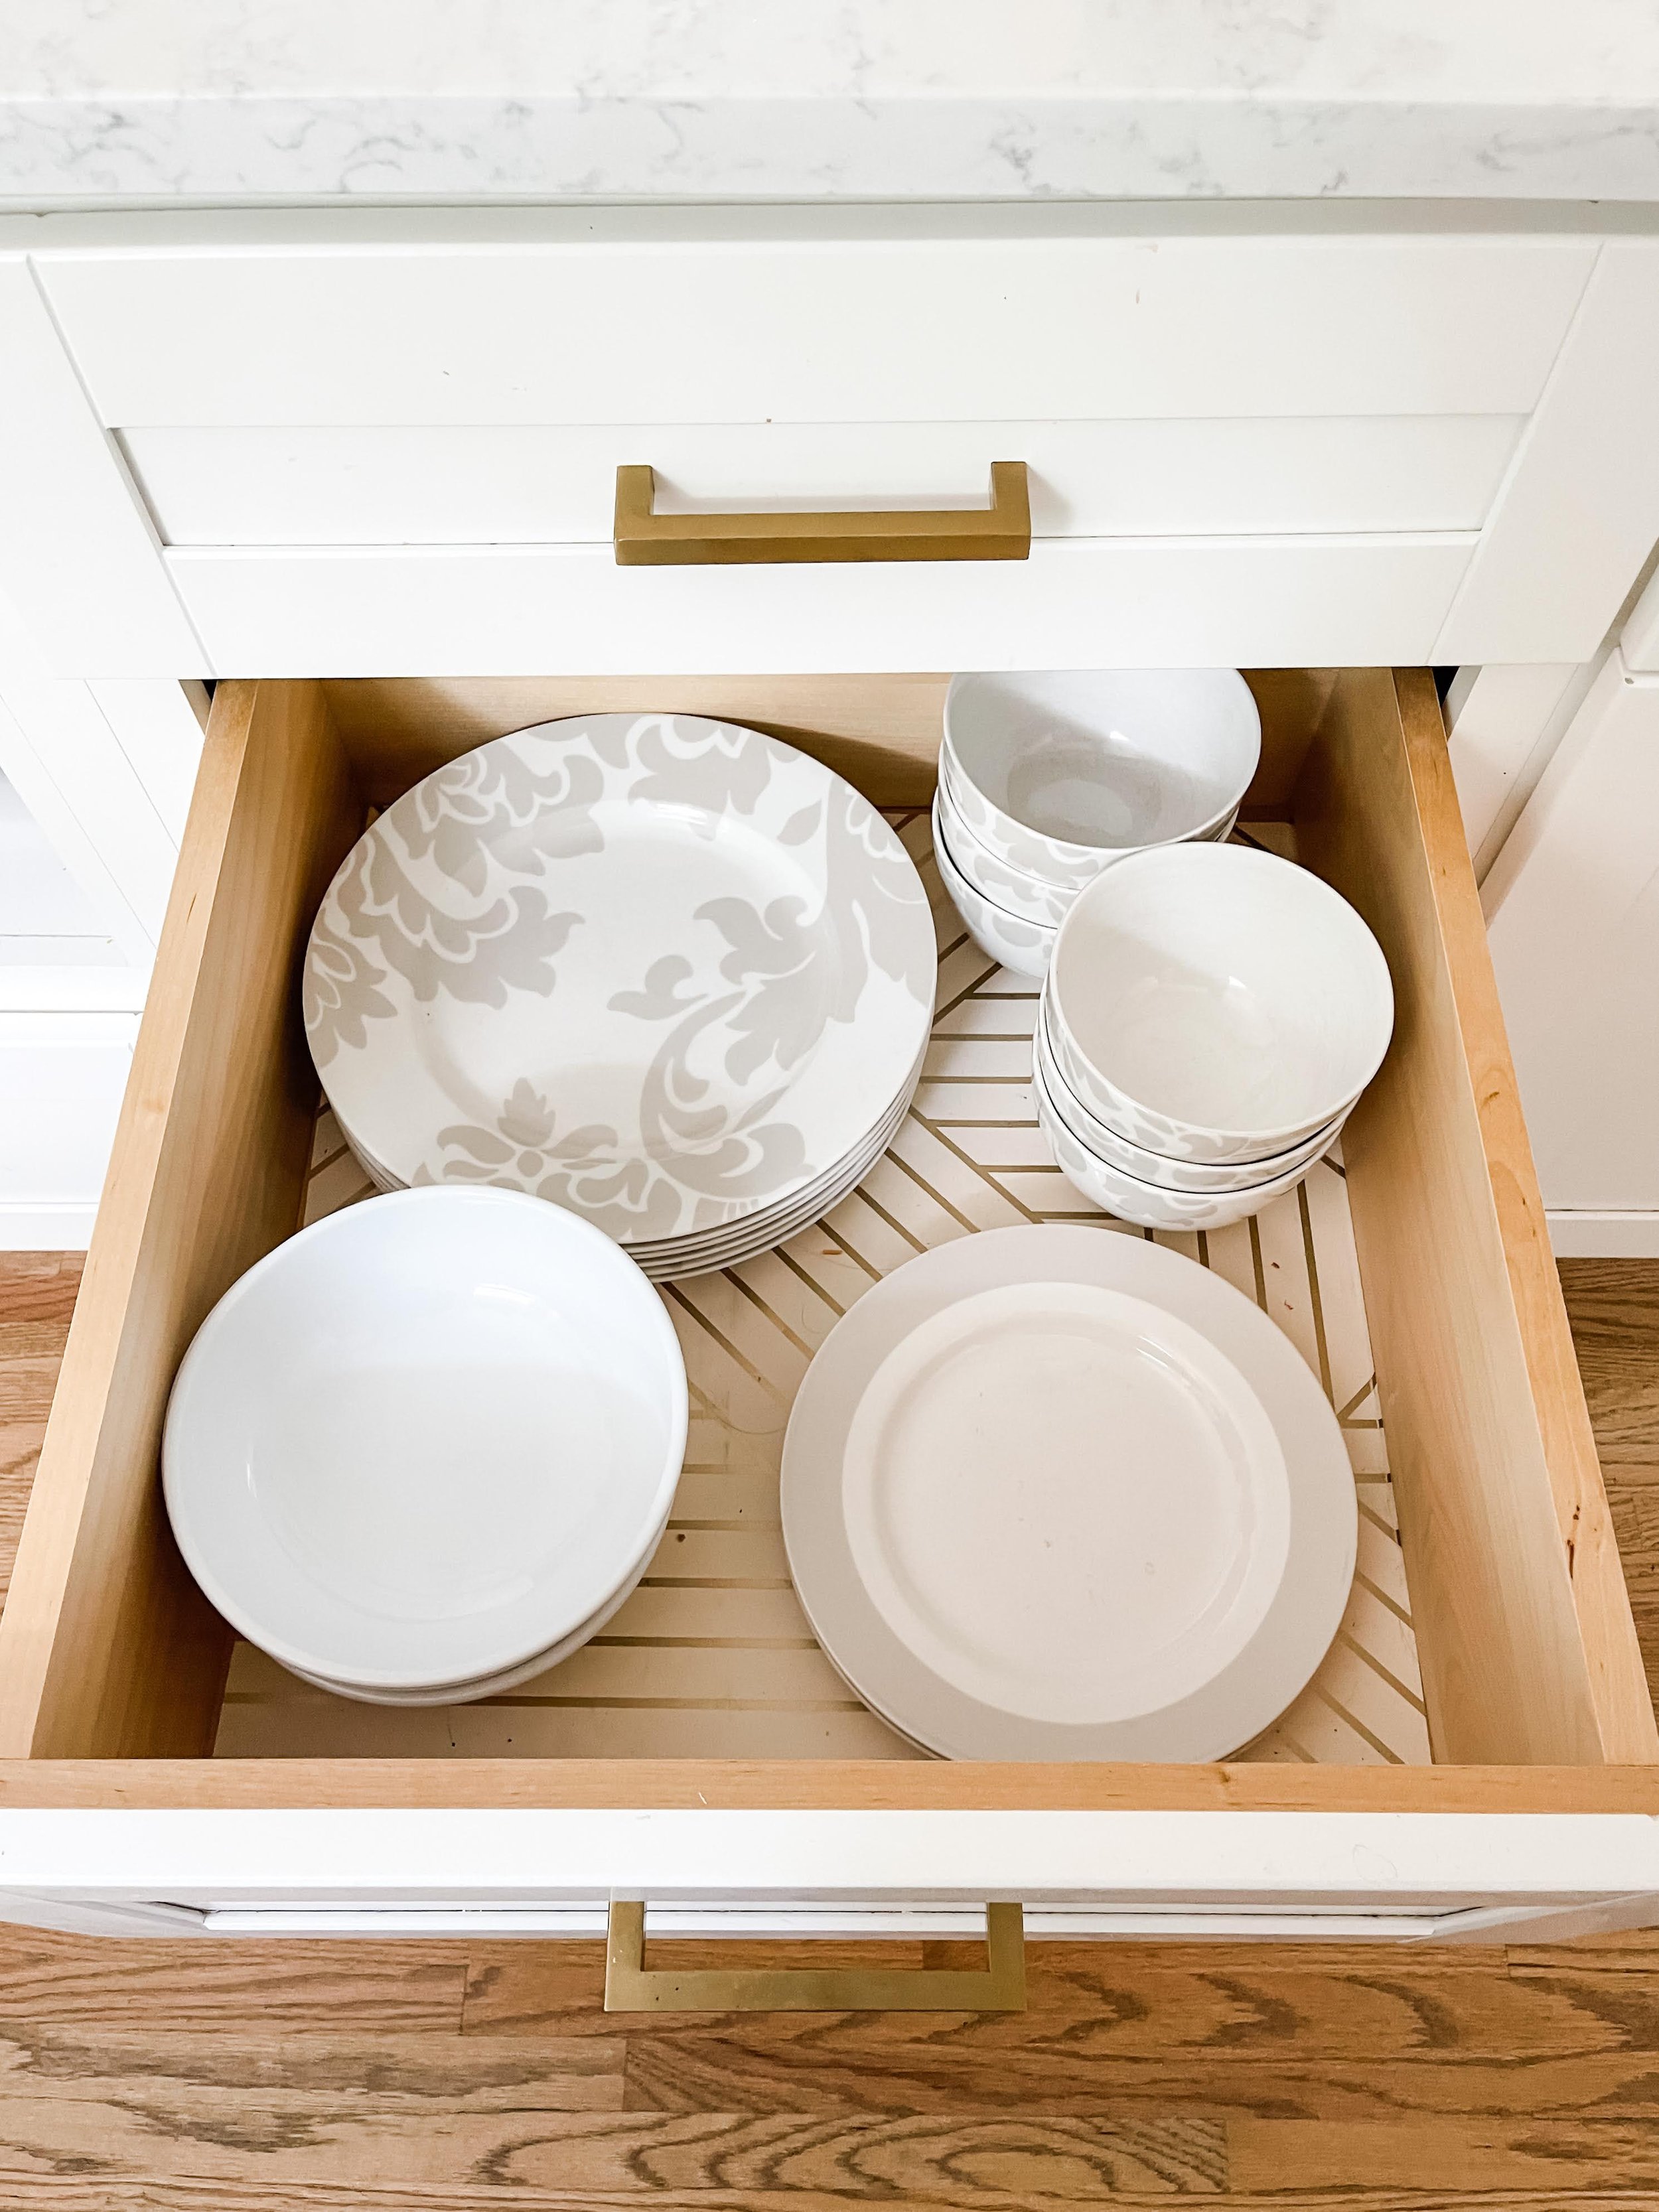
The cabinet to the left of the sink (over the dishwasher) is where I keep our everyday cups, water bottles and drink mixes. Its easy to unload the most of the top rack of the dishwasher immediately into this cabinet . In this kitchen, I used one of my deep drawers for storage of my everyday plates and bowls. Below that, I store our kid cups and plates (AKA ‘the nanny drawer’). That empties 80% of the dishwasher without me having to move a step and makes it a lot less hellish of a chore.


Above the fridge, I store big items that frankly won’t fit anywhere else. I use a metal divider to hold baking trays, a muffin tray, cooling racks and a few serving dishes. Next to that I have a collection of baskets that I hope to mount on our wall at some point but also use for serving at times. This cabinet is super deep so its great for those items that just won’t fit anywhere else but are still mildly kitchen related.
the island: everyday zone

Opposite the fridge and dishwasher is the island with a large drawer bank, hidden double trash can and several drawers. I call this our everyday zone. From left to right is our microwave. I store the boys’ lunchboxes on top. Below the microwave, I store glass cookware, casserole dishes, large pyrex bowls (I’ve considered putting these in the baking section) and a stack of serving bowls. I also stash my potatoes and onions inside the stack of bowls when we have some on hand.


The middle drawer bank is my favorite part of the kitchen. I’ve never put my everyday china in a drawer and it is working out really well. Best of all, its so easy to unload the dishwasher. I used acrylic clear trays for the silverware drawer. For the middle drawer, I thought about getting a peg divider to keep the plates and bowls from sliding but so far this hasn’t been a problem. At the bottom of the bank is the kid drawer. I used one drawer divider for plastic cups and two y-weave bins to divide the boys’ cups (you don’t have to do this but my kids have different milks so this helps avoid confusion). In the back are the kid plates and next to that are the trash bags (right next to the trash bin in the next cabinet over). This drawer is kid friendly. They can play with anything in the drawer and its where I can redirect them away from other cabinets in the kitchen while I’m cooking. So far, its worked really well for both boys.

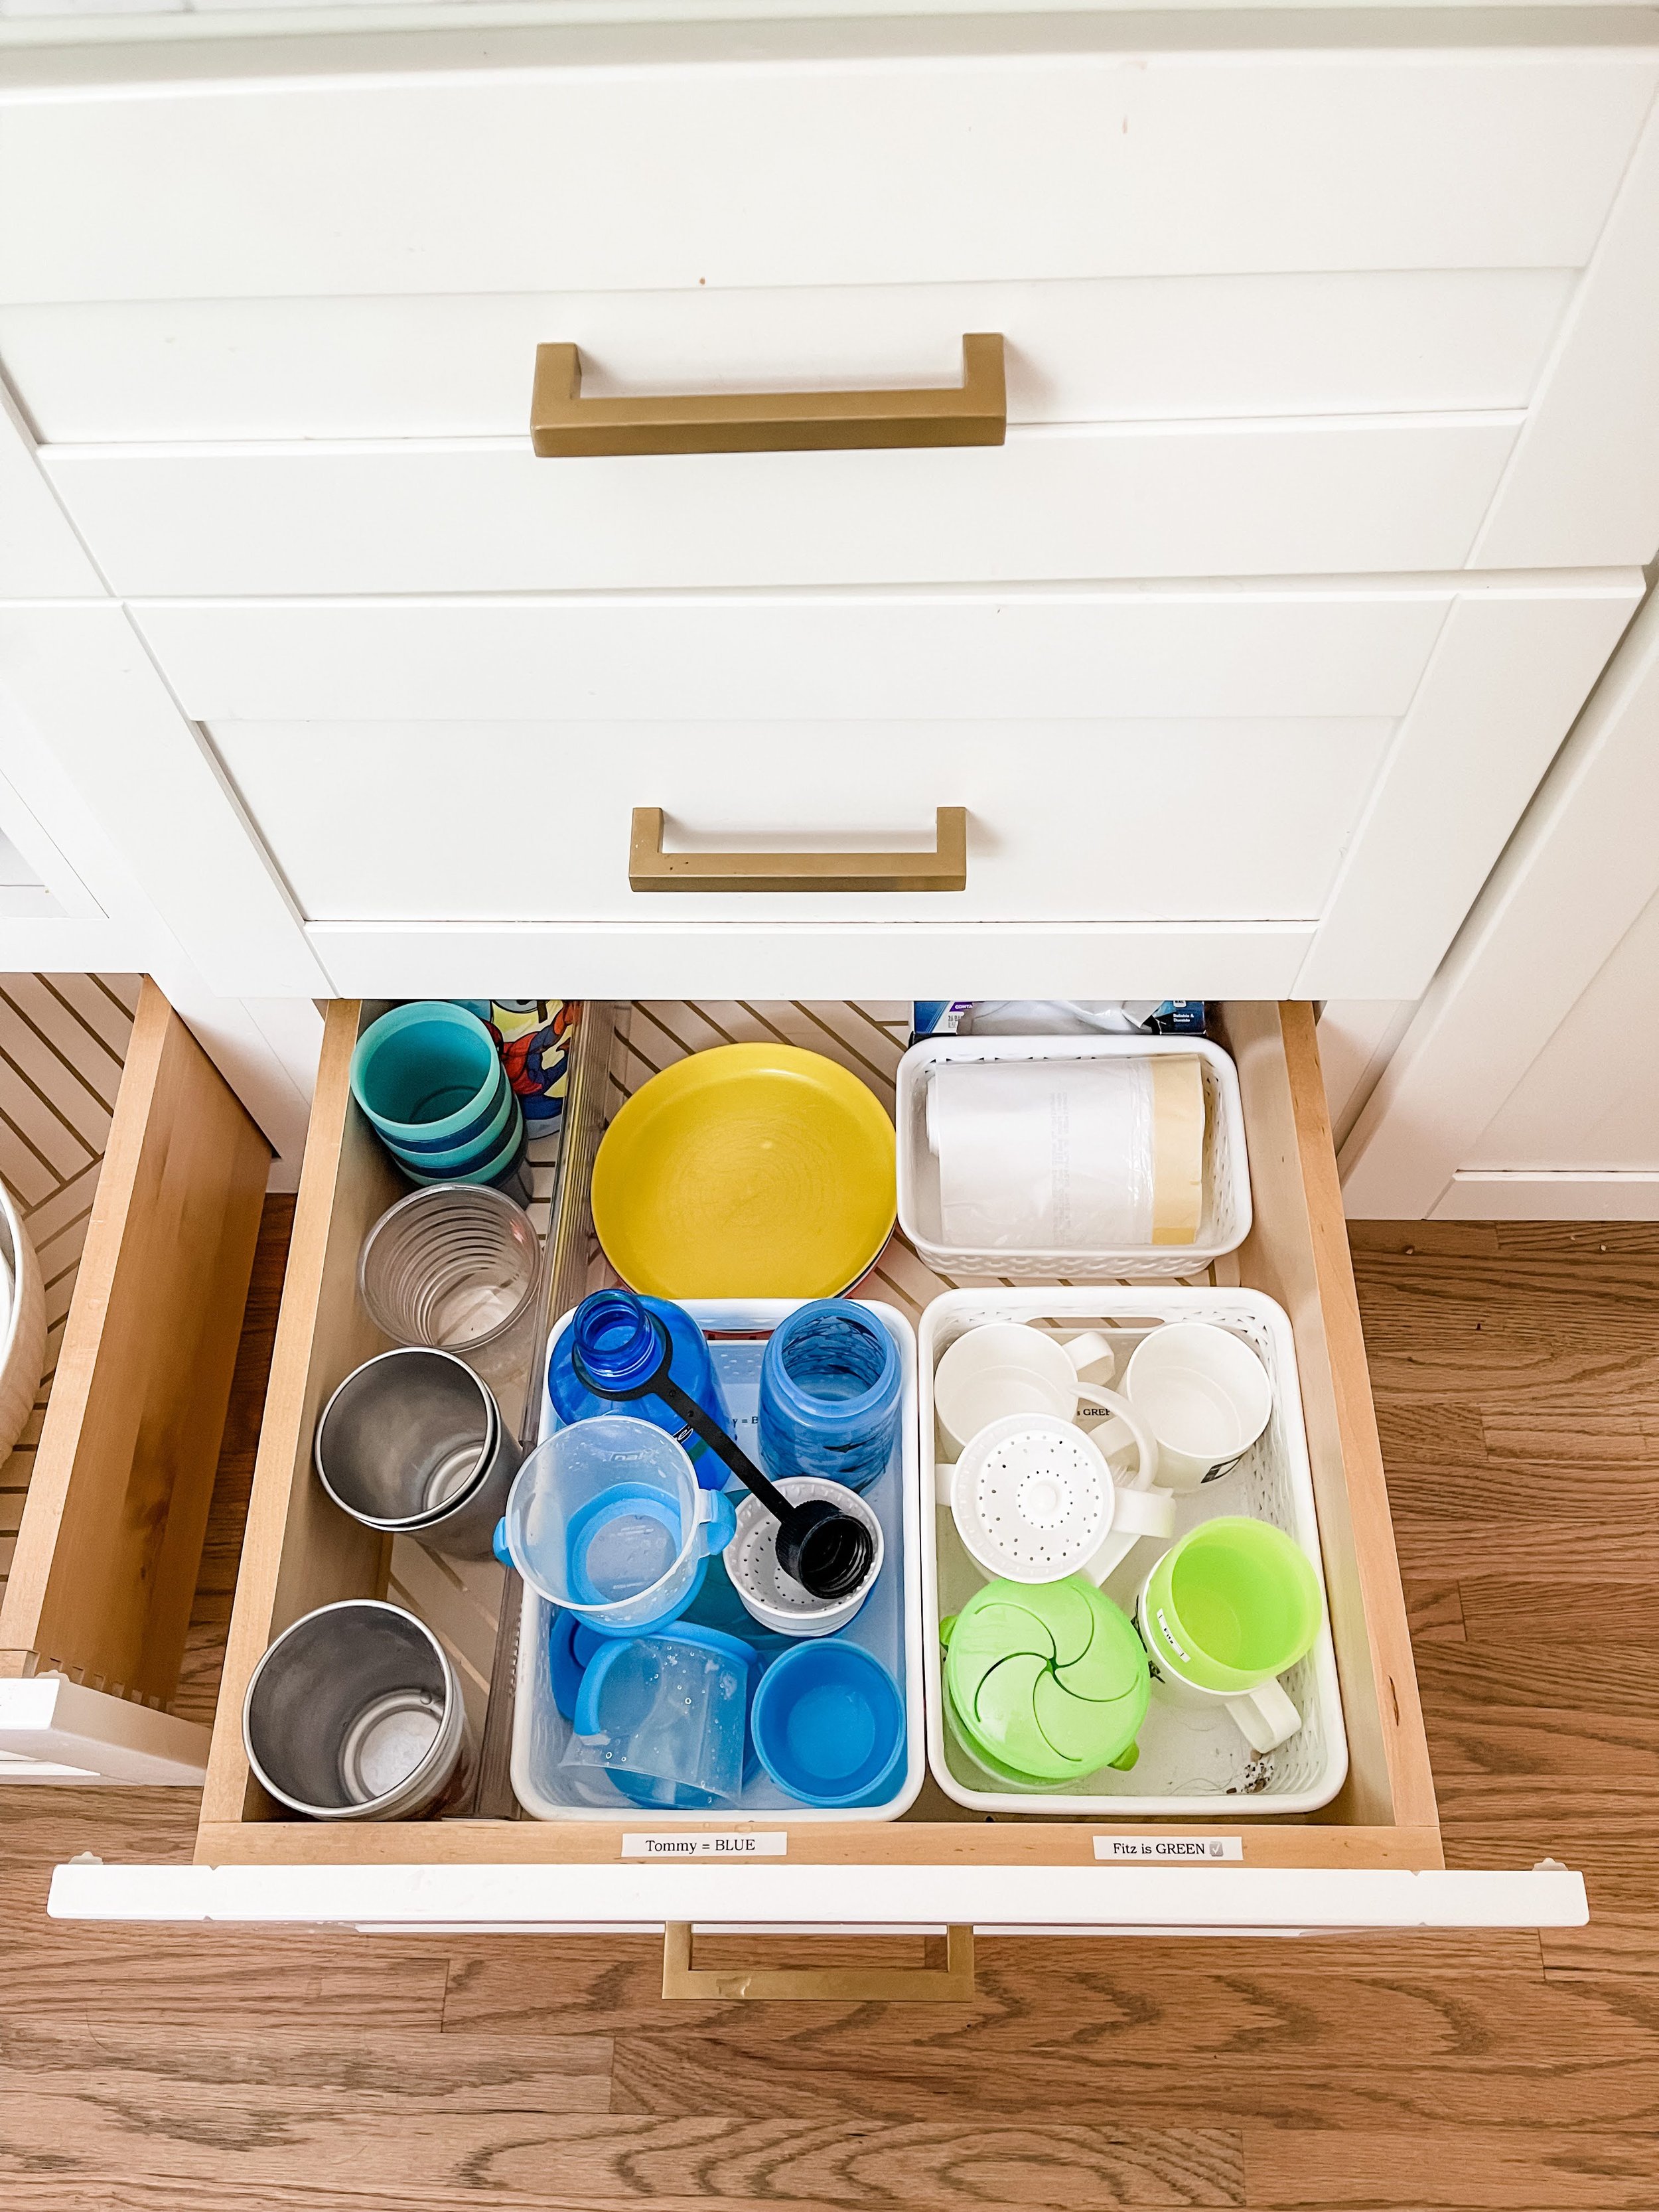
CLEAR STORAGE TRAYS | PLATE PEGS | Y WEAVE BINS | DRAWER LINER | CLEAR DRAWER DIVIDER
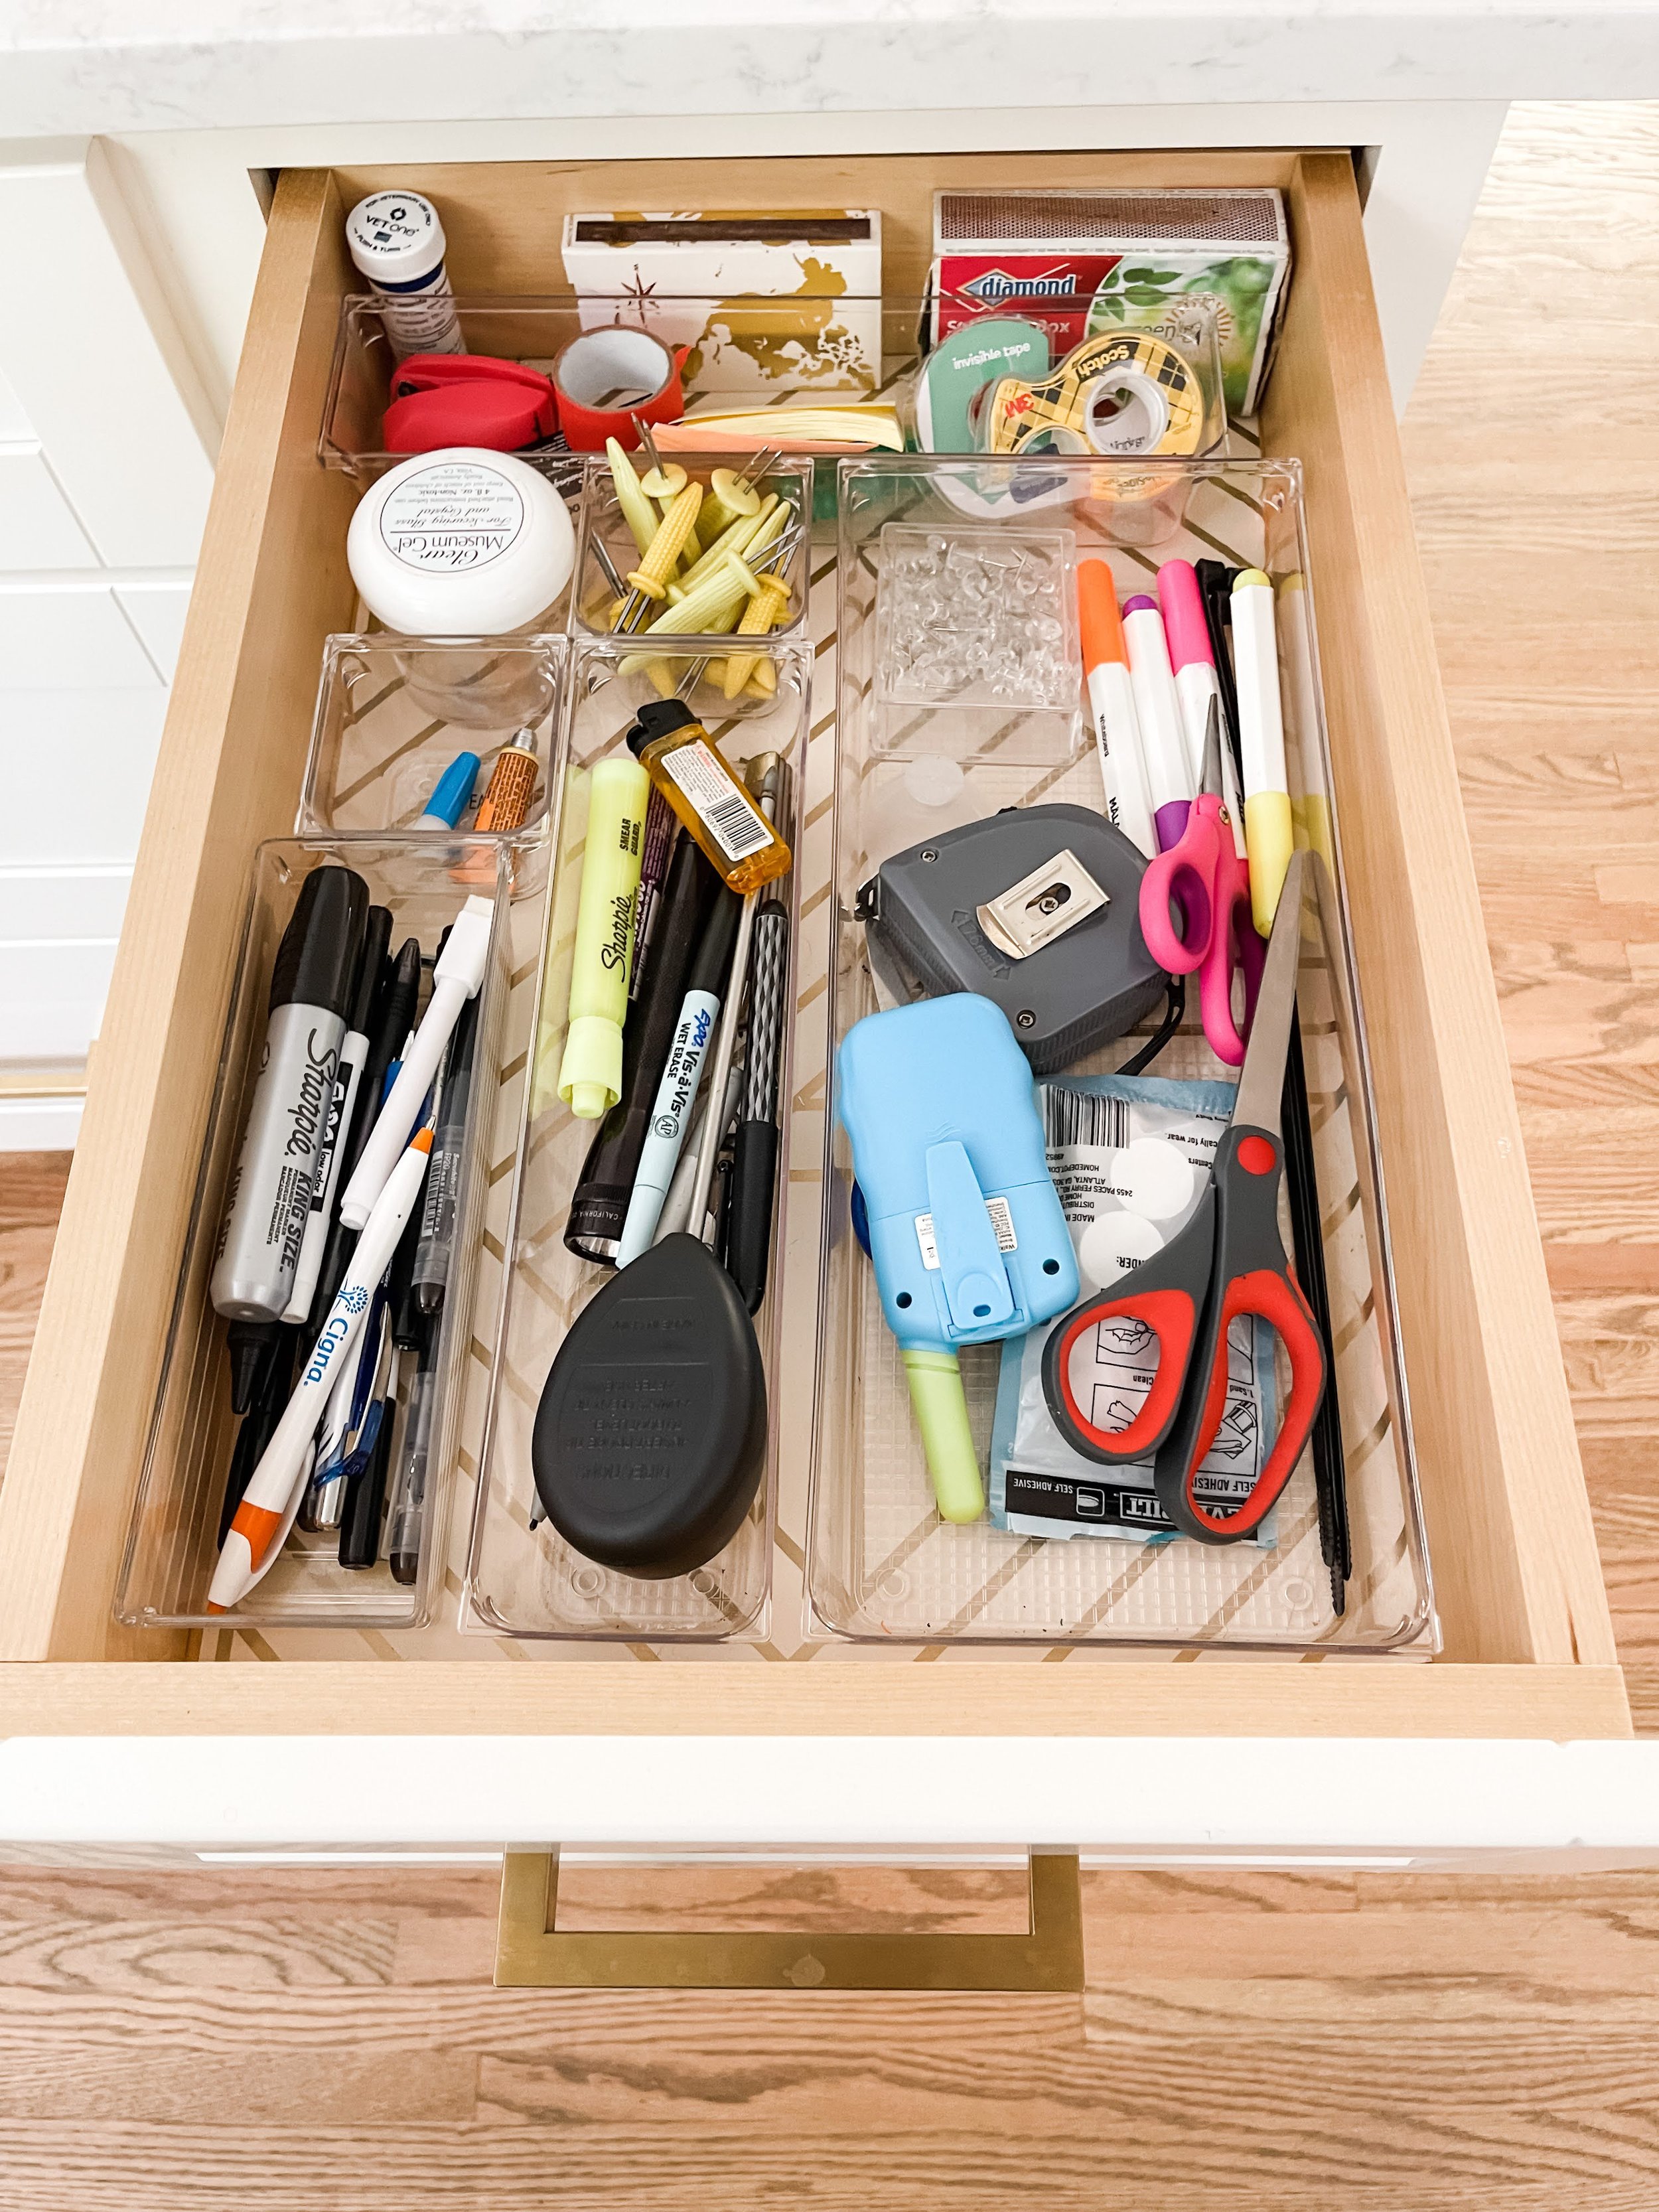
On the far part of the island is a double trash can. We use the front bin for waste and the back bin for recycling. Above the hidden trash cabinet is our junk drawer. I keep pens, scissors, matches, tape, a small stapler, a white chalk marker, museum gel and tape measure in here. These are all items I grab frequently.


CLEAR STORAGE TRAYS | DOUBLE TRASH CAN PULL OUT
So that’s how I store and organize each and every drawer in my kitchen space. You can probably see why we were super excited to add the pantry addition to the adjacent dining space. I’m looking forward to doing another post tomorrow packed with all the details of that space soon!
What did I miss? Any questions? I’m expecting lots of “Where do you put the….?” and I cant wait to hear from y’all. You can comment below or send your questions here and I’ll reply back.
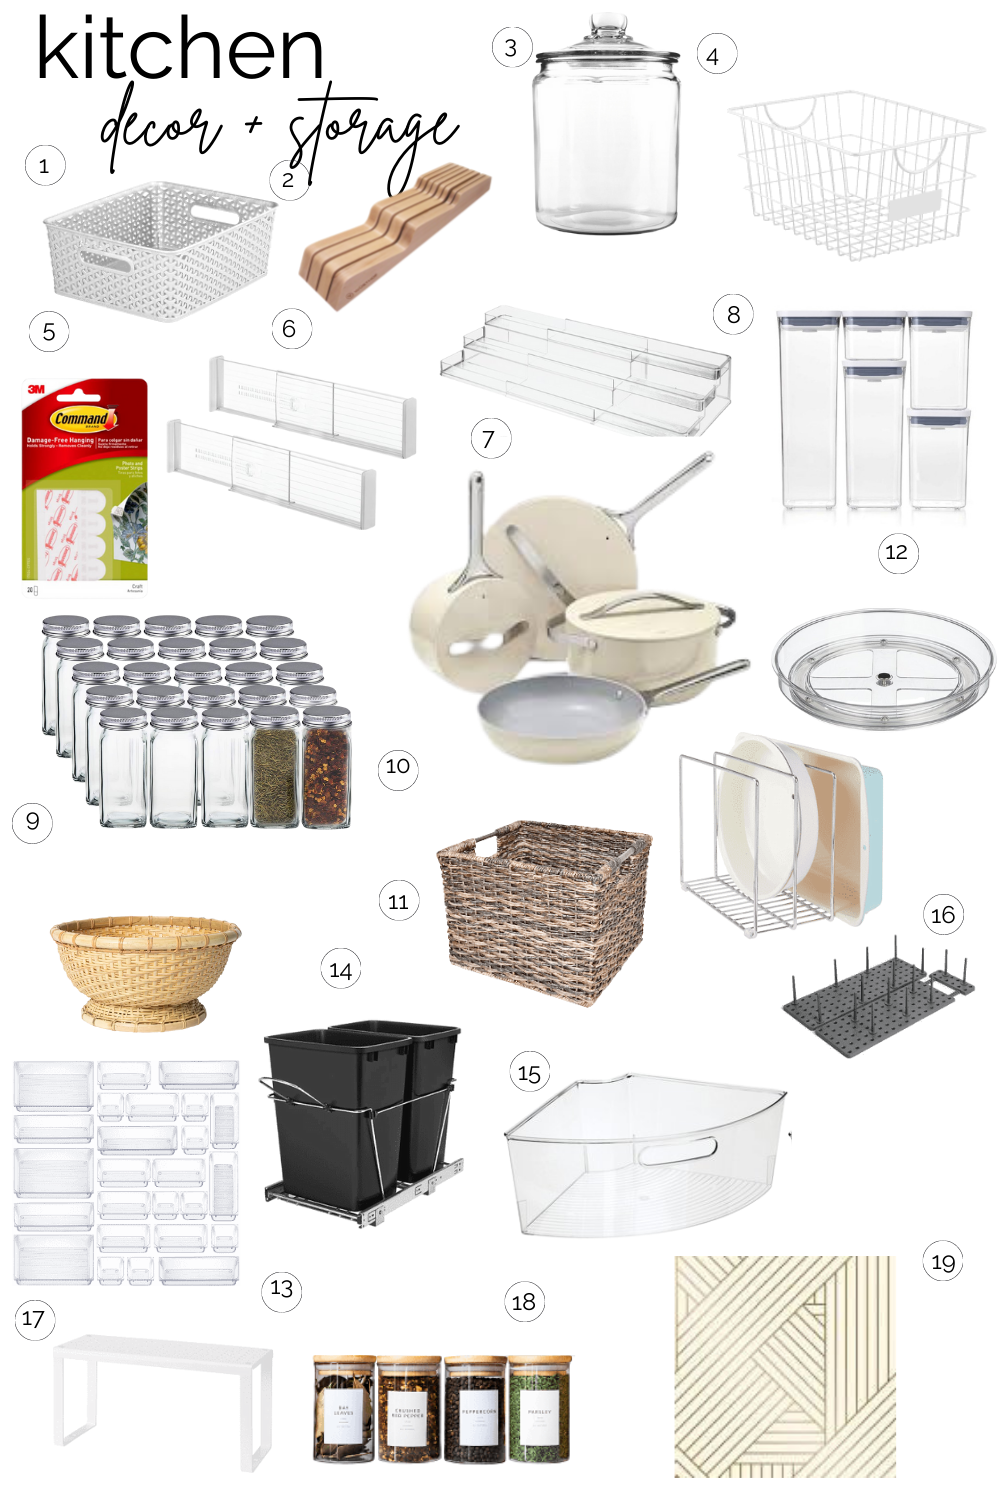
COOKBOOK STAND | COFFEE JAR | SPICE JARS | SPICE LABELS | TURNTABLES | AIRTIGHT STORAGE CONTAINERS | COMMAND HOOKS | POTS AND PANS | BASKET | CUTTING BOARD | DRAWER LINER | KNIFE BLOCK | CLEAR DRAWER TRAYS | STORAGE CONTAINERS | Y-WEAVE BIN | WEDGE ORGANIZER | WHITE SPINNER | GLASS COFFEE CONTAINER | SHELF DIVIDER | GIANT TURNTABLE | YELLOW SOAP | TRAY DIVIDER | WOVEN BASKET | WIRE BASKET | PLATE PEGS | Y WEAVE BINS | CLEAR DRAWER DIVIDER | DOUBLE TRASH CAN PULL OUT