
How to create a family photo album (without the overwhelm)
Sharing all the details on how to create an annual family photo album using Google Photos and Shutterfly without the overwhelm, stress and procrastination.
About 8 years ago I went to visit my cousin and saw that she creates a photo album every year and gives it to her husband on Valentines’ Day. I loved looking through them and thought it was the perfect coffee table book (and gift idea!). It was such a great way to see, use ad enjoy photos that I copied her!
You might be thinking, I’d love to do this too! But I don’t…
know where to start
have any idea how to organize all the photos
know which programs to use
know how to get photos from my phone to an album easily
or how to choose which ones should go in the album
Don’t worry! I felt the exact same way. Thats why I’ve spent the last 8 years figuring out the best way to corral all of our family photos into an annual album. I’m going to share how you can create your own family photo album using Google Photos and Shutterfly the easy way. Here is my step-by-step guide for exactly what to do:
STEP 1: Download Google Photos to your phone and allow it to sync with your photos. This will automatically sync, backup and store your photos in chronological order. Read more about why I love using Google Photos here.
STEP 2: Open Shutterfly and select “photo books.”
I suggest using the 12 x 12 size (under “create by size”) to really get the most bang (photos) per page for your book. This size makes for a great coffee table book as well. Regardless of which size you choose, consider that you will likely want to have the same size for years to come. Consistency will make storage and display of your photo albums easier.

STEP 3: Choose a Shutterfly photo book style. Some of my favorite Shutterfly book styles for family albums are:

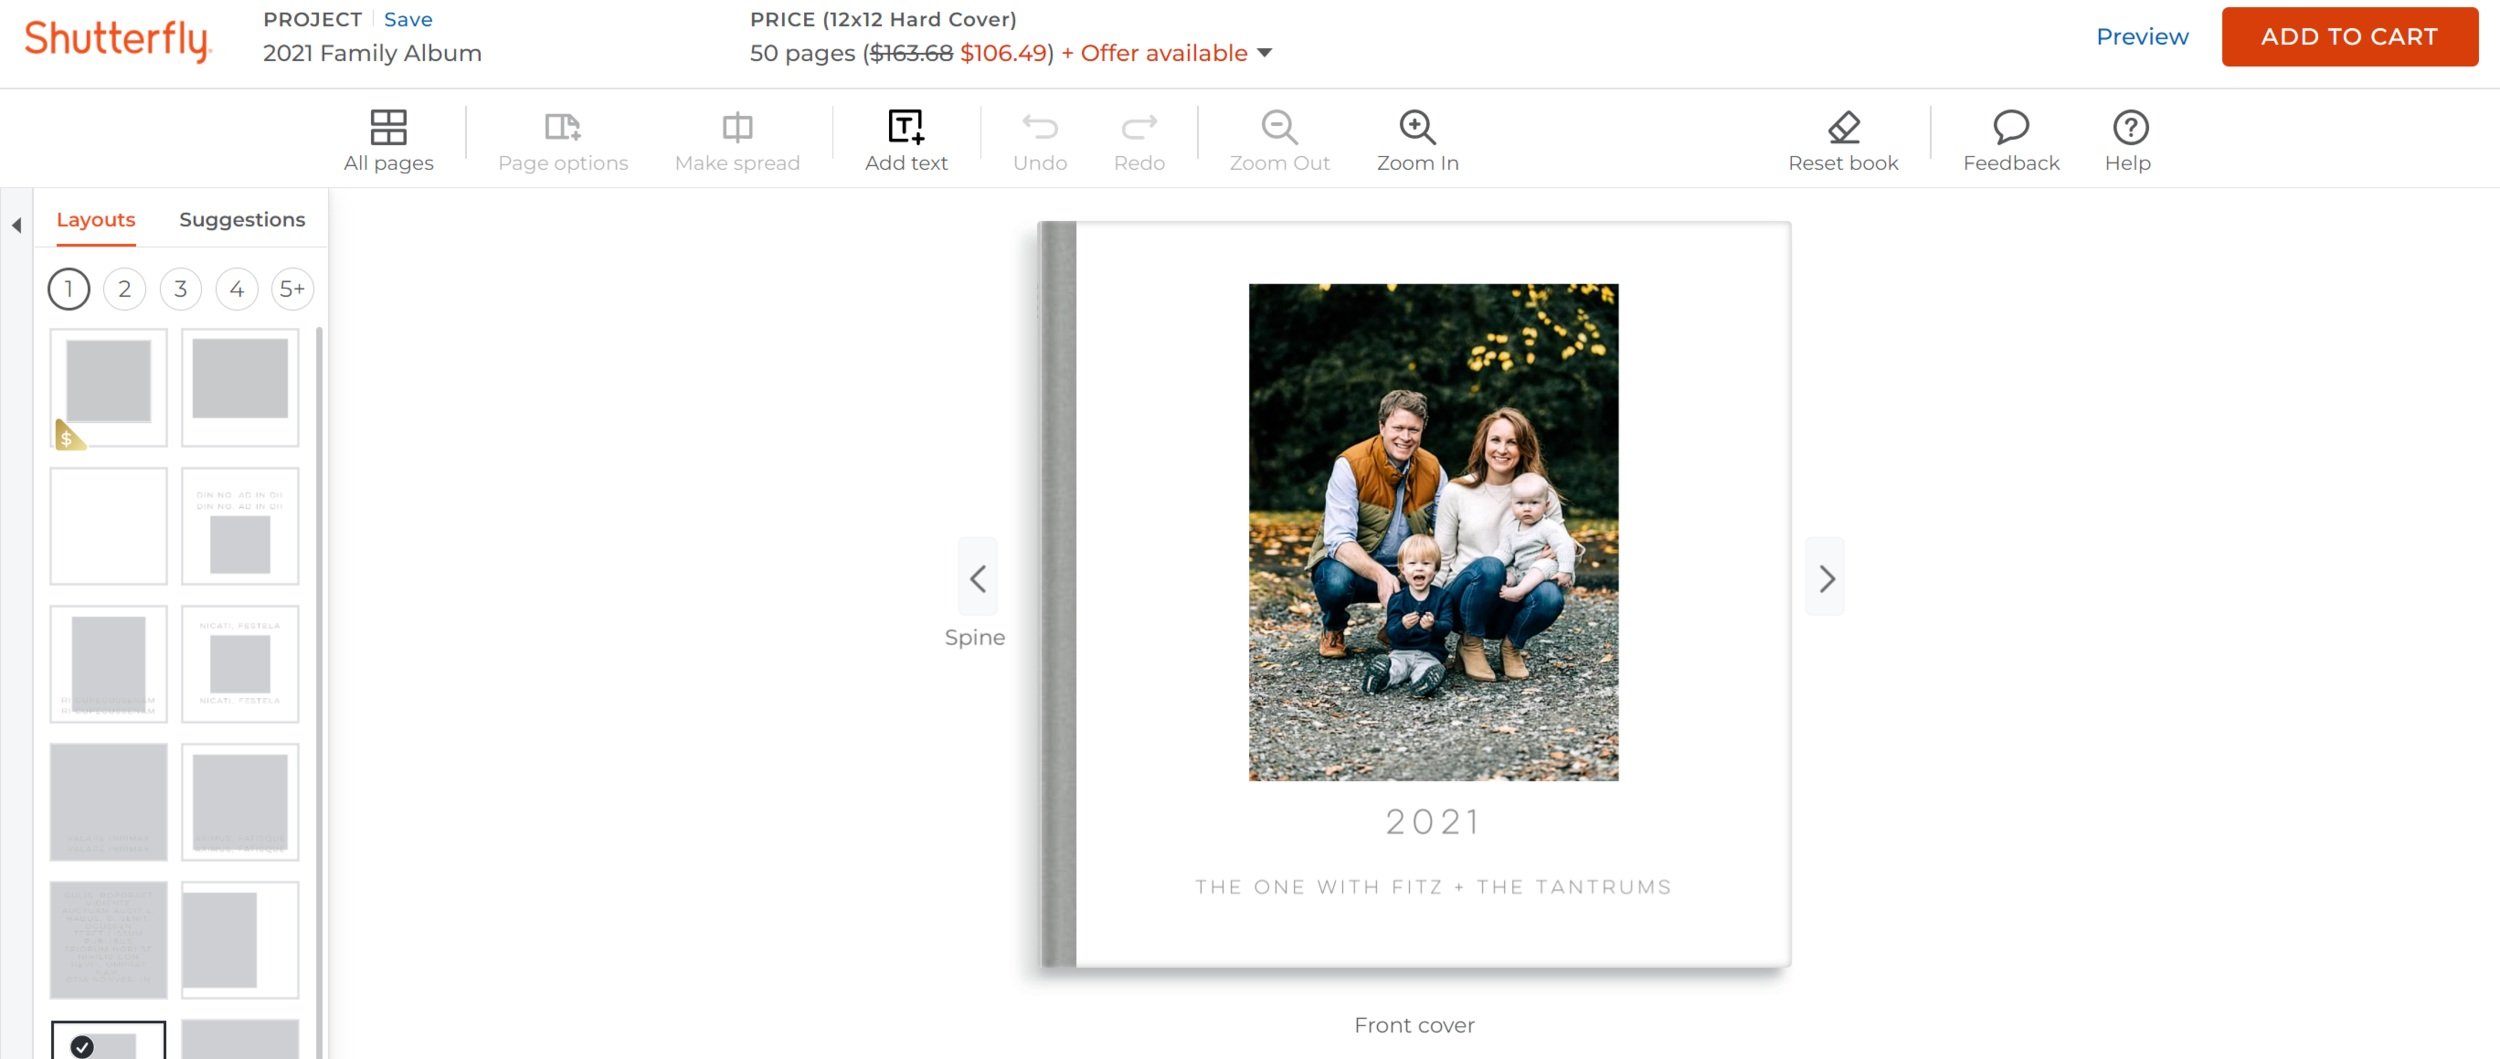
STEP 4: Finalize your style choice and choose “full control.”
From here you will finalize your size, style and pick special options like flat lay or not. Once you select your style, you can choose your own path: Give me the shortcuts or Full Control. I suggest choosing FULL CONTROL.
STEP 5: Connect Google photos to Shutterfly by selecting “add photos.”
This is where you are going to connect Google Photos to Shutterfly to make it super easy to create your family photo album.

Now I’m going to show you the magic of organizing your photos in Google Photos (read more here). You will be able to upload your best photos chronologically by month directly to your album for a seamless annual family photo album created in Shutterfly:
ON YOUR PHONE:
Open Google Photos and create a new album in Google Photos.
Open Google photos. Tap Library. Tap the “+” PLUS sign to create a new album. Label the album “CURRENT MONTH YEAR.” For example, January 2021.
Select relevant photos to add to the album. For example, I generally start wtih the month of January. I scroll through photos for the month of January. To do this, tap “select photos.” All of your photos will be available for selection. Scroll to the beginning of the month. By moving the up and down arrow cursor on the right-hand side of your screen you can see the month and year (another feature I love about Google Photos). This will help you navigate through hundreds of photos quickly.


Save only your best photos to the album. Simply select the photos you want to keep and then click “add” at the top right corner of your screen. You have now ORGANIZED an entire month’s worth of photos.
Repeat steps 1-3 for subsequent months. I like to organize one month of photos in Google photos and then create those pages in my Shutterfly album.
I toggle back and forth until the album is complete. You can do this whichever way you choose but this has worked most efficiently for me.
BACK TO SHUTTERFLY →
STEP 6: Select the relevant album.
(and then hit select all photos.) I highly suggest organizing the family photo album by month. This will provide a chronological order of events. Don’t worry too much about chronological order of events throughout the month. This is too detailed and will keep you from moving forward. One idea is to group biggger events like birthdays, trips and holidays on their own pages within the month (see my tips and tricks below!).
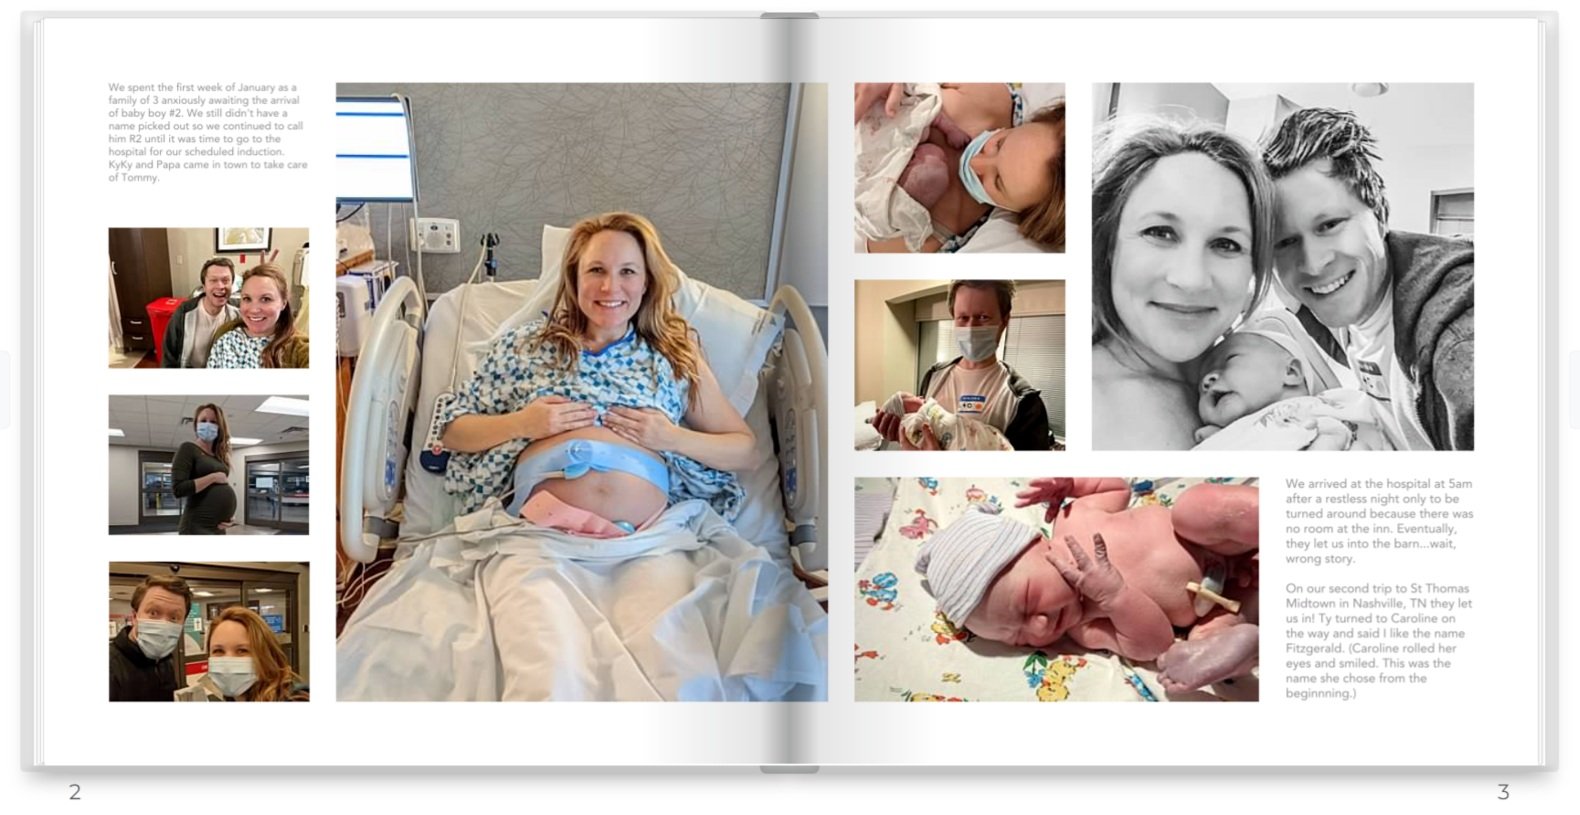
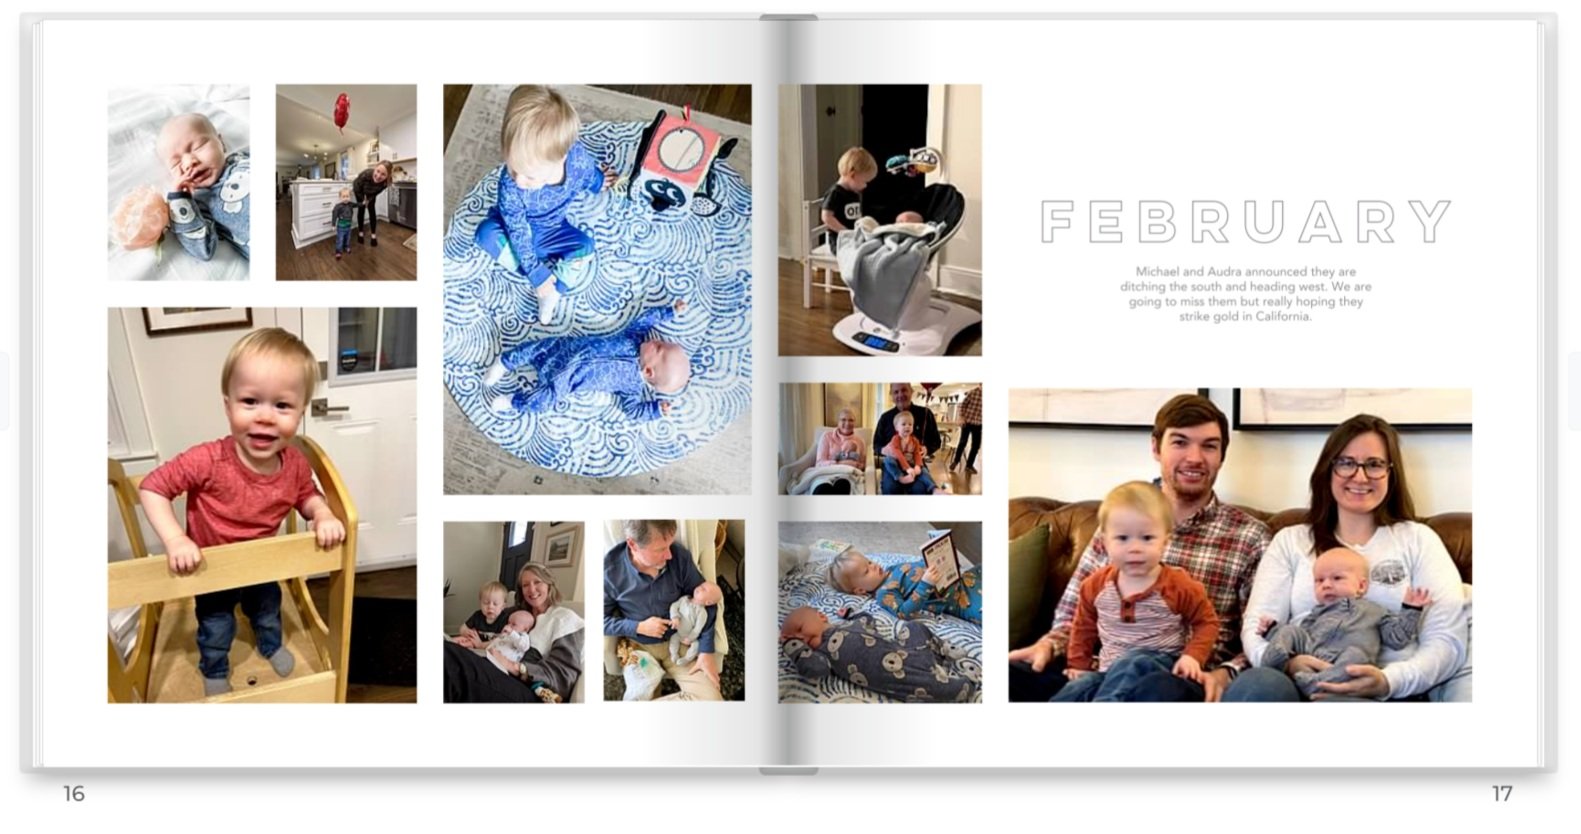
STEP 7: Add photos to each page, select the spread layout (left side of photo below) and make notes or remarks about the month. Here are some examples:
“June was a big month. Tommy turned two and Fitz got his first bear with Papa and KyKy at Phillip's Toy Mart. Fitz continues to grow and his reflux seems to be 90% resolved thanks to Ty's idea to eliminate dairy. He continue to sleep through the night and had his first illness with wheezing. It was certainly scary. He is working on sitting up and rolling over. He has a great appetite and has tried apple sauce, mashed potatos and avocado. Loves them all!”
Ty continues to prep for his upcoming elk hunting trip. We spent time at the pool and in the sun, celebrated Caroline turning 21 (again) and played with friends. At the end of the month Ty and Tommy headed to Cumming for fishing and trains (but not together)."
“Fitz turned 7 months old this month. He transfers objects from one hand to the other. He knows his name and waves. Tommy still calls him Hit. Other nicknames are Willy, Wiggles and Sir Wiggleton. He smilies easily and knows his people. Its so cute to see him sway his head to music too.”
** Don’t forget to indicate the month somewhere on the first page of the month or within the text.
Repeat Steps 6 and 7 until you end in the month of December. Preview your book, read through the text and note any edits or grammatical errors.
STEP 8: Order your book and enjoy!
TIPS + TRICKS:
You can add pages along the way. My typical annual family photo album averages around 55 pages.
I have a paper calendar in my kitchen that I make quick notes on throughout the year. I like to reference this and add those remarks as my text for the album.
Select “Hide Used” at the bottom of the editing page in Shutterfly and make sure its turned on so that you can easily place unused photo in your album.
Consider doing a full page spread for big events in a given month like a birthday, holiday or trip. Then you can collage the rest of the photos and summarize the rest of the month on an additional page or two.
You can add embellishments and symbols if you want. I usually keep it pretty simple and just do a month's sticker and text.
Keep up with the monthly organization of photos throughout the year to make creating the photo album super easy. A long car ride is a great time to do it!

SNOW DAY
Fun additions:
Add a page at the end of where you traveled that year. A simple list will do.
Add a page of marriages, births and deaths.
Write a summary of the year at the end, what you’ve learned and what you hope for the coming year.
Create a final page or two of all the remaining photos in a big collage.
PIN NOW FOR LATER!